

Pro Tips & Projects
Smart fixes. Real projects. Straight talk from your local pros.
Keeping a home running smoothly is a full-time job — and most people don’t have the time, the tools, or the patience to figure it all out. That’s where we come in.
Welcome to your go-to hub for expert tips, real project breakdowns, money-saving strategies, and homeowner how-tos — all written in clear, real-world language, never contractor-speak.
Whether you’re trying to stay ahead of problems, plan a remodel, or avoid getting ripped off, you’ll find exactly what you need right here… from pros who do this every day.
No fluff. No guesswork. Just straight-up help you can use.
What You’ll Find Here:
Pro Tips to extend the life of your home
DIY-Friendly Fixes anyone can handle safely
Project Breakdowns from real jobs we've completed
Money-Saving Advice to avoid costly mistakes
Before & After Transformations to spark ideas
Seasonal Checklists to keep your home in top shape
Need Personalized Advice?
If you ever want help with a repair, a renovation idea, or just a second opinion, we’re only a message away.

How to Create a Spa-Like Bathroom in Salt Lake City: 5 Upgrades That Feel Luxurious (But Stay Practical)
How to Create a Spa-Like Bathroom in Salt Lake City: 5 Upgrades That Feel Luxurious (But Stay Practical)
You want a bathroom that feels like a high-end spa: but you also want something that works with real life in Salt Lake Valley. Good news: you can have both.
The trick isn't cramming every trendy feature into your space. It's choosing upgrades that deliver actual luxury and handle Utah's hard water, dry climate, and daily wear from families who actually use the space. From a bathroom remodeling contractor's perspective, the best spa-like bathrooms balance high-end aesthetics with materials and fixtures that won't become maintenance nightmares six months down the road.
Here's what works: and what matters most: whether you're in Herriman, Riverton, Sandy, Magna, or West Valley City.
1. Walk-In Showers With Therapeutic Features
This is where most homeowners start, and for good reason.
Walk-in showers combine sleek, modern design with easier accessibility. But here's what makes them feel truly luxurious: therapeutic jets, rainfall showerheads, and wide, frameless glass enclosures that open up the entire space visually.
What to look for:
Multi-function shower systems with body jets and overhead rainfall features
Bench seating built into the design for comfort and function
Wide entry doors (no tight squeeze to get in)
Curbless or low-curb entries that keep water contained while maintaining a clean, open look
Why it matters:
A walk-in shower isn't just about looks. It's about creating a bathing experience that actually relaxes you: every single day. Therapeutic jets target sore muscles after a long shift. Rainfall showerheads provide full coverage without the harsh spray of standard fixtures. And when you design the enclosure properly, you control splashing while maintaining that open, airy feel.
2. Therapeutic Soaking Fixtures That Actually Get Used
If you have the space, a soaking tub changes everything.
But here's the reality check: standard bathtubs don't deliver the spa experience you're imagining. You want either a freestanding soaking tub with clean lines and depth, or a walk-in tub with therapeutic jets if accessibility and safety matter to your household.
What to consider:
Freestanding tubs positioned near windows or as focal points
Walk-in tubs with wide entry doors, built-in seating, and jet systems
Deep soaking depth (at least 19-20 inches) for full immersion
Materials that retain heat longer: cast iron or high-quality acrylic
Why it matters:
A soaking tub only feels luxurious if you actually use it. That means choosing the right fixture for your household. Families with older adults or mobility concerns benefit more from walk-in tubs with safety features and therapeutic jets. Homeowners looking for pure relaxation should prioritize depth, ergonomic design, and heat retention.
Tub material and depth matter, especially in Utah’s cooler, dry winters. Materials that hold heat longer and tubs designed with depth keep your soak comfortable from start to finish.
3. Mineral-Resistant Materials (Because Salt Lake Hard Water Is Brutal)
This is where practical meets luxury: and where most DIY plans fall apart.
Salt Lake City's hard water creates mineral buildup on everything. Shower doors fog with white deposits. Tiles develop dull residue. Grout discolors. If you don't choose mineral-resistant materials from the start, your spa-like bathroom will look dated and grimy within months.
What to look for:
Shower doors with protective coatings that repel mineral deposits
Bath surrounds engineered to resist cracking, mildew, and discoloration in hard water conditions
Porcelain or glazed ceramic tiles over natural stone (Natural stone requires regular sealing and maintenance in Utah’s hard water conditions)
High-quality grout with sealants designed for Utah water chemistry
Why it matters:
You're investing in a luxury bathroom. You don't want to spend every weekend scrubbing mineral deposits off glass and tile just to keep it looking clean.
Mineral-resistant materials reduce maintenance demands dramatically: keeping that polished, spa-like appearance year-round with normal cleaning. From a contractor's perspective, this is where proper material selection saves you time, frustration, and money over the bathroom's lifespan.
4. Premium Hardware and Finishes That Tie Everything Together
Here's what separates a nice bathroom from a luxurious one: cohesive, high-quality finishes.
Mixing brushed nickel faucets with chrome towel bars and random builder-grade hardware creates visual chaos. Spa-like bathrooms use consistent finishes across every fixture and accessory: from faucets to drawer pulls to lighting fixtures.
What to look for:
Matching finish families: brushed nickel, matte black, polished chrome, or oil-rubbed bronze
Solid construction in faucets, showerheads, and hardware (avoid lightweight, hollow pieces)
Waterfall faucets or vessel sink pairings for statement fixtures
Heated towel racks and built-in storage that blend with your finish palette
Why it matters:
Premium hardware isn't just about aesthetics: though the visual impact is immediate. Higher-quality fixtures resist corrosion better in Utah's mineral-heavy water. They maintain their finish longer. They feel solid when you use them daily.
And when every finish coordinates, the entire space feels intentionally designed rather than pieced together. That's what creates the spa atmosphere you're after.
This is also where working with an experienced bathroom remodeling contractor saves you hours of research and second-guessing. Design consultations help you select finishes that work together and match your vision without endless browsing or ordering mistakes.
5. Lighting and Layout Optimization
You can install every luxury fixture imaginable: but if the layout feels cramped or the lighting is harsh, it won't feel like a spa.
Natural light is the foundation. If you have windows, maximize them. If you don't, strategic artificial lighting creates the same effect: soft, layered, and warm.
What to look for:
Recessed lighting on dimmers for adjustable ambiance
Wall sconces flanking mirrors at eye level (no harsh overhead shadows)
Backlit mirrors or LED strips for modern, even illumination
Task lighting in the shower or above the tub
Natural light from windows, skylights, or solar tubes where possible
Layout matters just as much:
Separate wet zones (shower, tub) from dry zones (vanity, toilet) for better flow
Strategic storage that keeps counters clear: medicine cabinets, built-in niches, floating vanities
Traffic flow that doesn't require awkward navigation around fixtures
Why it matters:
Good lighting transforms how a space feels. Harsh fluorescent overhead lights remind you of locker rooms: not spas. Layered lighting with dimmer controls lets you adjust the mood from bright and functional to soft and relaxing.
And layout optimization maximizes your space: whether you're working with a compact 5x8 bathroom or a spacious master suite. Professional designers plan fixtures and accessories based on how you actually use the space, eliminating wasted square footage and awkward traffic patterns.
Most homeowners in Herriman, Riverton, Sandy, Magna, and West Valley City don't have unlimited space for bathroom remodels. Smart layout planning makes what you have work harder: and feel more luxurious.
The One-Call Approach That Makes It Happen
Here's the reality of bathroom remodels: they involve plumbers, electricians, tile setters, painters, and finish carpenters. When you're coordinating those trades yourself, the project drags on for weeks: or months: with gaps in the schedule, miscommunications, and costly mistakes.
That's why homeowners across the Salt Lake Valley work with a general contractor who handles everything from design to completion. One point of contact. One team managing every phase. No juggling multiple crews or wondering who's responsible when something goes wrong. We work with individually licensed and insured specialists to meet all of your homeowner needs.
For a bathroom remodel in Salt Lake City, this approach means:
Design consultation that matches your vision with practical execution
Accurate timelines
Coordinated scheduling with all trades
Quality control at every phase
Minimal disruption to your daily routine
You get the spa-like bathroom you're imagining: without the headache of managing a multi-trade construction project yourself.
Ready to Create Your Spa-Like Bathroom?
Luxury bathrooms aren't about cramming every trendy feature into your space. They're about choosing upgrades that deliver real comfort, handle Utah's unique climate challenges, and create an atmosphere that actually relaxes you after long days.
Walk-in showers with therapeutic features. Soaking fixtures designed for your household. Mineral-resistant materials that stay beautiful. Premium hardware with cohesive finishes. Lighting and layout that maximize every square foot.
If you're ready to start planning your bathroom remodel, visit www.yourcontractorpros.com and click the "Book Now" link. We'll walk through your vision, show you what's possible in your space, and handle everything from design to the final walkthrough.
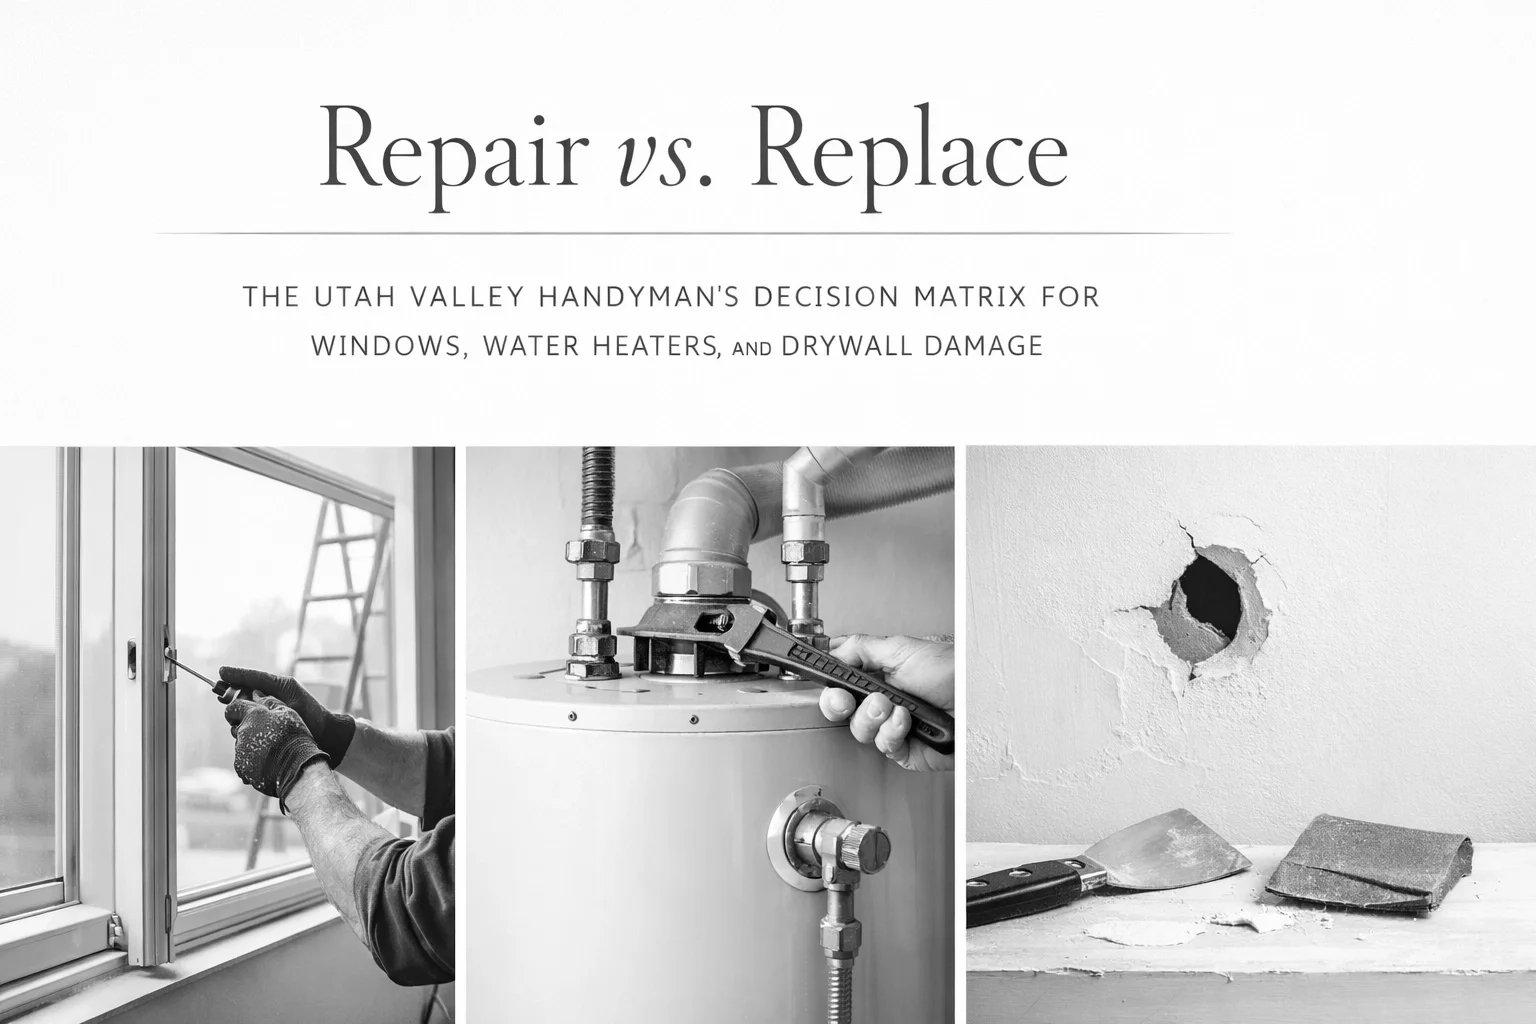
Repair vs. Replace: The Utah Valley Handyman's Decision Matrix for Windows, Water Heaters, and Drywall Damage
Repair vs. Replace: The Utah Valley Handyman's Decision Matrix for Windows, Water Heaters, and Drywall Damage
You're standing in your basement, staring at a water heater that's making weird noises. Or maybe you're looking at a foggy window in your Herriman living room, wondering if you can just replace the glass. Or there's that drywall hole in the hallway that your teenager definitely didn't make with a doorknob (wink, wink).
The question is always the same: Do I repair this thing or just replace it?
Here's the deal: Many homeowners waste thousands on replacements they didn't need and throw good money after bad on repairs that were never going to last.
So let's break down the actual decision-making process for three of the most common "repair or replace" headaches Utah homeowners face: windows, water heaters, and drywall damage.
The Windows Question: When Utah Weather Tells You It's Time
Windows in Utah take a beating. We've got temperature swings that go from single digits in January to triple digits in July. That expansion and contraction cycle is brutal on seals, frames, and glass.
Repair if:
The window is less than 10 years old and just has a broken seal (that foggy look between panes)
The frame is solid wood or vinyl with no rot or warping
Only the hardware is broken (locks, cranks, balances)
It's a single pane of glass that cracked
A broken seal on a double-pane window in Sandy? That's usually a $150-$300 repair, depending on size. Replacing just the glass unit is way cheaper than a whole new window, and if the frame is solid, there's no reason to rip everything out.
Replace if:
The frame is rotted, warped, or shows moisture damage
You're getting drafts even after weatherstripping and caulking
The window is original to a home built before 1990 (Utah energy costs make this a no-brainer)
Multiple seals have failed across different windows in the house
Here's the thing: if you're in West Valley City and your 1980s aluminum windows are still "working," they're costing you extra in heating and cooling. At that point, replacement isn't about the window: it's about your utility bill. Homeowners can see noticeable reductions in heating and cooling costs after upgrading old single-pane or aluminum windows, especially when combined with proper air sealing.
Want to know more about small fixes that impact your home's value? Check out our post on 10 small issues that quietly tank your home's value.
Water Heaters: The Ticking Time Bomb in Your Utility Room
Water heaters are weird because they can fail in a hundred different ways, and some are $75 fixes while others mean you're buying a new tank.
Repair if:
The unit is less than 8 years old
It's a simple thermostat, heating element, or pressure relief valve
There's no visible rust on the tank itself
The leak is coming from a valve or connection point (not the tank)
Plenty of $30 thermostats can save homeowners a $1,200 water heater replacement. If your Riverton home has hard water (and let's be honest, most of the valley does), you might just need to flush the tank and replace the anode rod. That's a $150-$250 service call versus buying new.
By the way, if you're dealing with hard water issues, we wrote a whole guide on fixing hard water problems in Utah homes.
Replace if:
The tank is 10+ years old (even if it's "working fine")
There's rust-colored water coming out of your hot tap
You see moisture or rust on the outside of the tank
The leak is coming from the tank body itself
You've already repaired it twice in the past two years
Here's the math: if your water heater is 9 years old and needs a $400 repair, you're throwing money at something that's statistically about to die anyway. In hard-water areas like much of the Salt Lake Valley, tank-style water heaters often last toward the lower end of the typical 8–12 year lifespan if not regularly maintained. At that point, spend the $1,000-$1,800 on a new unit and get another decade of reliable hot showers.
The 50% Rule: A common rule of thumb many contractors use is the 50% rule. If the repair costs more than 50% of what a replacement would cost, just replace it. This applies to basically everything in your house, but it's especially true for water heaters.
Drywall Damage: Size Matters (And So Does Location)
Drywall is one of those things where homeowners either panic about nothing or completely underestimate the problem. Let's get this straight.
Repair if:
The hole is smaller than a softball
It's in a non-load-bearing wall
There's no water damage, mold, or structural issues behind it
The texture is simple (orange peel, knockdown)
A four-inch hole in your Magna hallway? That's a $150-$250 patch and paint job. We cut out the damaged section, put in a backer, mud it, sand it, texture it, and paint it. Done in a day. Even something the size of a dinner plate is still repairable for under $400.
Replace if:
The damage is widespread (like water damage from a roof leak)
There's mold behind the drywall
Multiple areas of the same wall are damaged
The studs or framing are compromised
It's an entire wall that needs new insulation anyway
If you've got water damage in a Sandy bathroom from a slow leak, we're not patching: we're cutting out the entire affected section, checking for mold, possibly reframing, and putting up new drywall. At that point, trying to save $100 on drywall means you're risking mold growth behind your walls.
One more thing: if the damage is in a high-visibility area like your living room and the texture is complicated (like hand-troweled knockdown or popcorn), sometimes it's actually cheaper to skim-coat and repaint the whole wall than to try to match a patch perfectly. That's where experience matters.
Other Factors for Your Decision Matrix
Beyond the specific item, here are some questions you should ask yourself:
1. How long are you staying in this house?
If you're selling in six months, we're probably repairing unless it's something that'll kill the inspection. If you're staying for ten years, we're making the investment-grade decision.
2. Will this affect your home value or sale?
A 20-year-old water heater will get flagged on an inspection. A patched window might not. Check out our thoughts on curb appeal and maintenance for more on this.
3. What's your total maintenance budget right now?
If you've got five things that need attention, we might repair three and replace two. Prioritization is key.
4. Are there rebates or tax credits available?
Utah periodically offers some solid energy efficiency programs and rebates. Availability and eligibility vary by year and provider, so be sure to check in every so often so you don't miss out on some great deals.
Why You Want a Licensed Contractor Making This Call
Look, I get it: there are a lot of "handymen" in the Salt Lake Valley who'll give you a price without actually diagnosing the problem. The difference with working with a licensed general contractor is that we're looking at the whole system. We work with individually licensed and insured electricians and plumbers to make sure everything is done properly.
When you call about a leaking window, we're checking the flashing, the caulking, the drainage plane, and the framing. When you call about drywall damage, we're looking for the why behind it. And when you call about a water heater, we're testing pressure, checking code compliance, and making sure you're not going to have the same problem in six months.
We specialize in those smaller, high-impact repairs that big remodeling companies won't touch, but we bring full B100 General Contractor expertise to every job. That means you get honest recommendations based on building science, not just what'll get us the biggest invoice.
The Bottom Line
The repair-versus-replace decision isn't always clear-cut, but here's the framework we use:
Under 50% of replacement cost and less than 2/3 through its lifespan? → Repair
Over 50% of replacement cost or nearing end of life? → Replace
Safety or code issue? → Replace, no question
Cosmetic in a low-priority area? → Repair (or just live with it)
If you're in Herriman, Sandy, Magna, Riverton, West Valley City, or anywhere in the Salt Lake Valley and you're staring at something wondering "repair or replace?", that's literally what we do all day. Give us a call and we'll give you the honest answer: even if that answer is "just leave it alone for now."
Because sometimes the best repair is the one you don't do yet.

Drafty Doors & Windows: The $100 Fix That Can Lower Your Heating Bill This Winter
Drafty Doors & Windows: The $100 Fix That Can Lower Your Heating Bill This Winter
Listen, if you're sitting in your living room right now and you can feel that cold breeze sneaking in around your door, you're not imagining it. And worse? You're literally watching your hard-earned money blow right out of your house every time your furnace kicks on.
February in Salt Lake Valley isn't exactly gentle. Whether you're in Sandy, Herriman, or up in Bountiful, you know the drill, those Utah winter nights can drop below freezing fast, and your heating system is working overtime. But here's the thing: you might not need new windows or a total door replacement to stop the bleeding. Sometimes all it takes is about $100 worth of weatherstripping, door sweeps, and fresh caulk to make a massive difference.
Let me show you how to plug those leaks tonight, and why having Your Handyman Pros handle it might be the smartest move you make this winter.
The Invisible Money Leak in Your Home
You probably check your bank account. You watch your heating bill climb every month. But have you ever actually held your hand near your front door on a windy day? Or felt around the edges of those bedroom windows?
Most homeowners in the Salt Lake Valley don't realize how much conditioned air they're losing through tiny gaps around doors and windows. We're not talking about obvious broken glass or a door that won't close, these are the invisible leaks. Even a small gap under a door can leak surprising amounts of air over the course of a Utah winter.
Here's what happens: Cold air sneaks in through these gaps, your thermostat senses the drop, and your furnace fires up again. Rinse and repeat, all day, all night. According to energy studies, air leaks can account for around 25–30% of the energy used for heating and cooling. That's literally hundreds of dollars a year going straight out the door, sometimes quite literally.
The worst part? Most people assume they need to replace the whole window or door to fix the problem. That's like buying a new car because you have a flat tire. In most cases, the door and window themselves are fine. They just need a proper seal.
The $100 Solution: Weatherstripping, Door Sweeps, and Caulk
Here's the good news: the fix is usually way simpler (and cheaper) than you think. For about $100 or less, you can seal up the most common air leaks in your home. Let's break it down:
Weatherstripping is your first line of defense. This is the foam, rubber, or adhesive material that goes along the edges of doors and windows to create an airtight seal when they're closed. You can pick it up at any hardware store, self-adhesive strips start around $5-10 per roll. The key is getting the right type for your specific gap and making sure it's installed correctly (more on that in a minute).
Door sweeps are those strips that attach to the bottom of your door to block the gap between the door and the threshold. If you've ever felt a cold breeze coming from under your front door, this is your fix. A decent door sweep runs about $10-20 and takes minutes to install.
Caulk is perfect for sealing stationary gaps, like where your window frame meets the wall, or around exterior door trim. A tube of quality exterior caulk costs $5-8, and you'll probably only need two or three tubes to tackle all the problem areas around your house.
Add it all up, and you're looking at $50-100 in materials, tops. If you're handy, you can knock this out in a Saturday afternoon. But here's where things get interesting.
DIY vs. Pro: Why It Pays to Get It Done Right
Look, I'm not going to tell you that you can't weatherstrip your own doors and windows. Plenty of homeowners do it. But there's a difference between slapping on some foam strips and actually creating an airtight seal that'll last through three Utah winters.
Here's what usually happens with DIY weatherstripping:
The adhesive doesn't stick properly because the surface wasn't cleaned and prepped correctly
The strips are uneven, leaving gaps in the corners
The wrong type of weatherstripping is used for the specific application
The door sweep is installed at the wrong height (too low and your door won't close; too high and cold air still gets in)
Caulk lines look messy or crack within a year because the wrong product was used
When Your Handyman Pros tackles weatherproofing, we don't just seal the obvious gaps. We do a full inspection while we're there. Why? Because sometimes what looks like a simple draft is actually pointing to a bigger problem.
Maybe that gap under your door exists because your threshold is rotting and needs to be replaced. Maybe your window frame is pulling away from the wall because of settling. Maybe there's moisture damage that could lead to moisture or mold issues if left untreated. As a B100 General Contractor, our team can spot these issues, and more importantly, we can fix them properly without you needing to call three different companies.
Plus, here's the honest truth: we can weatherstrip your entire house in a few hours, and it'll be done right. Clean lines, proper seal, materials that'll last. For most homeowners, that DIY project turns into a full weekend ordeal with multiple trips to Home Depot because you bought the wrong size the first time.
The ROI: This Fix Pays for Itself Fast
Let's talk numbers. The average home in Salt Lake Valley spends somewhere between $80-150 per month on heating during the winter months. If air leaks are costing you 25-30% of that efficiency, you're wasting $20-45 every single month.
Do the math: even if you spend the full $100 on weatherproofing materials and a couple hours of professional installation. For many homes, the upgrade can pay for itself within a season. Everything after that is pure savings, month after month, winter after winter.
But it's not just about the money. A properly sealed home is comfortable. No more cold spots. No more cranking the thermostat to 73° just to get the living room to feel like 68°. No more wearing a hoodie inside your own house.
And if you're thinking about selling in the next few years? Energy-efficient homes sell faster and for more money. Buyers in Draper, Herriman, and across the Salt Lake Valley are getting smarter, they ask about utility bills, they look for signs of deferred maintenance, and they notice when a house feels drafty during the showing.
Stop Paying to Heat the Outdoors
Look, February in Utah is already expensive enough without giving Rocky Mountain Power extra money for no reason. If your doors and windows are drafty, you're literally paying to heat the neighborhood.
The fix is simple, fast, and affordable. Whether you want to DIY it with the right materials and guidance, or have us come out and handle it professionally (so you can spend your Saturday doing literally anything else), the important thing is to get it done before you waste another month of heating bills.
We service the entire Salt Lake Valley, Sandy, Herriman, Draper, West Valley City, Magna, Riverton, Bountiful, and everywhere in between. One call, one visit, and you'll actually feel the difference tonight when that cold breeze stops sneaking in.
Ready to stop the draft and start saving money? Give Your Handyman Pros a call and let's get your home sealed up tight. Your furnace (and your wallet) will thank you.
And hey, while we're there checking your weatherstripping, we can knock out those other small repairs that have been on your list forever. Just saying.
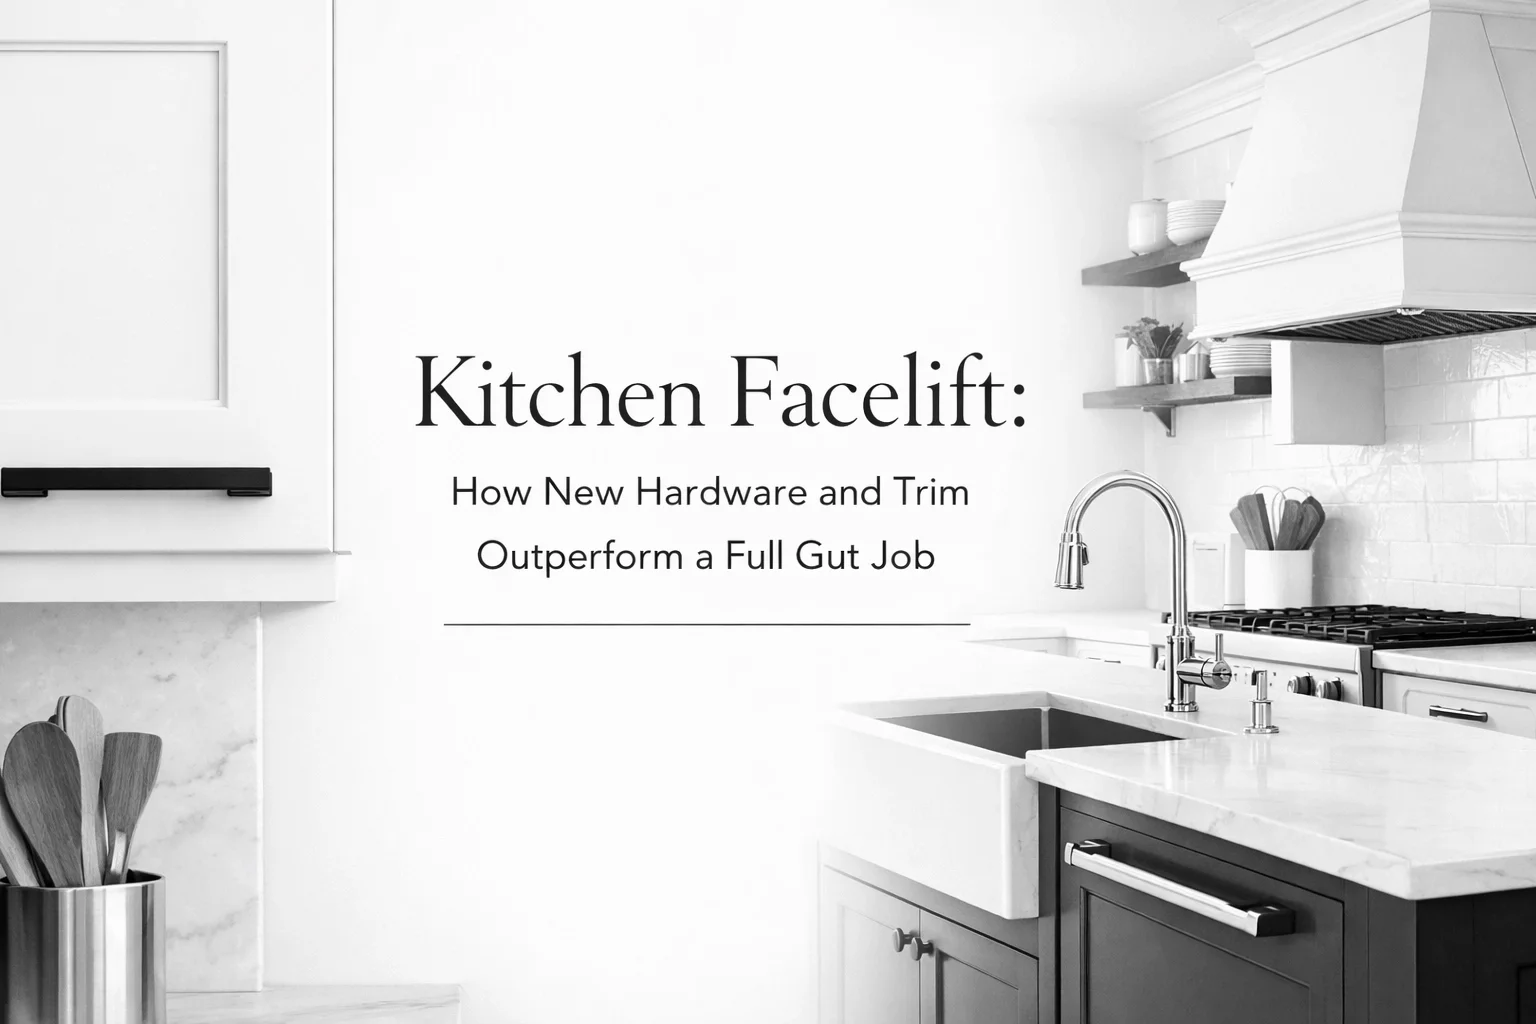
Kitchen Facelift: How New Hardware and Trim Outperform a Full Gut Job
Kitchen Facelift: How New Hardware and Trim Outperform a Full Gut Job
You've been scrolling Pinterest for weeks. The kitchen remodels are stunning, white shaker cabinets, waterfall countertops, custom islands that probably cost more than your car. In today’s market, full kitchen remodels often run $50,000+. And it'll take four months. Oh, and you can't use your kitchen during that time, so get really comfortable with your microwave and the Chick-fil-A drive-thru.
Here's the thing: you don't always need to gut your kitchen to make it feel brand new.
You can completely transform your tired kitchen without the chaos of a full remodel. We're talking about strategic, high-impact changes that take days, not months, and cost a fraction of the price. New hardware. Clean trim work. A little crown molding magic. Suddenly, your builder-grade kitchen from 2005 looks like it belongs in a 2026 home tour.
Let's break down how a smart kitchen facelift can give you that "wow" factor without the gut-job nightmare.
The "Gut Job" Myth: You Don't Always Need to Tear It All Out
The home improvement industry loves to sell you on the total teardown. Rip out the cabinets. Demo the counters. Relocate the plumbing. Start from scratch.
But here's the reality: if your layout works and your cabinets are structurally sound, you don't need a gut job. You need a facelift.
Most kitchens built in the last 20 years have decent bones. The cabinets are fine: they're just boring. The layout functions: it's just bland. The problem isn't structural; it's aesthetic. And aesthetic problems have aesthetic solutions that don't require a dumpster in your driveway.
A full gut remodel makes sense when:
Your layout is genuinely dysfunctional (like a fridge blocking the main walkway)
Your cabinets are falling apart or water-damaged
You're dealing with outdated plumbing or electrical that needs serious work
You want to move walls or add square footage
But if you just hate the look? If it feels dated but everything works? That's YHP territory. We specialize in making your existing space feel completely refreshed without the full construction circus.
Hardware Power: The 2-Hour Transformation
Let's start with the easiest, most dramatic change you can make: cabinet hardware.
Swapping out dated brass knobs and handles for modern finishes is like putting new shoes on an old outfit. It completely changes the vibe. We're talking:
Matte black for that sleek, contemporary look
Brushed gold or brass for warmth and elegance
Polished nickel for a classic, timeless feel
Oil-rubbed bronze for rustic charm
This isn't a DIY disaster waiting to happen, either. With the right drill, a template, and a B100 licensed contractor who knows how to measure twice and drill once, we can swap out all your cabinet hardware in a couple of hours. No learning curve. No wonky holes. Just a clean, professional result.
And the cost? We're talking a few hundred bucks for quality hardware and installation: not tens of thousands. Yet the visual impact rivals what you'd get from brand-new cabinets.
Pro tip: If your current hardware holes don't match the new pulls, we can fill, sand, and touch up the old holes so they disappear. Then we drill new ones in the perfect spot. That's the kind of finish carpentry detail that makes the difference between "DIY weekend project" and "Wait, did you get new cabinets?"
The Trim Secret: Crown Molding and Light Rail
Here's where things get interesting. Most builder-grade kitchens have cabinets that just… end. There's a gap between the top of the cabinet and the ceiling, usually filled with dust and that one serving platter you used in 2019.
Adding crown molding to the top of your cabinets instantly makes them look custom and high-end. It's the kind of detail you see in expensive homes, but it doesn't require an expensive remodel. We're talking about a weekend project with massive visual ROI.
Same goes for light rail molding under your upper cabinets. If you have under-cabinet lighting (or want to add it: more on that in a second), light rail hides the fixture and gives your cabinets a finished, polished look. It's a small detail that makes everything feel intentional and designed, rather than slapped together by a builder trying to hit a deadline.
This is where having a B100 licensed general contractor on your side really matters. We're not just nailing up some trim and calling it a day. We're measuring angles, scribing to walls, coping joints, and making sure every piece fits like it was always meant to be there. That's the difference between "good enough" and "looks like a professional did this."
Professional Polish: Why the Details Matter
You can buy the hardware at Home Depot. You can watch a YouTube video on installing crown molding. But we've got "Pros" in our name for a reason.
When we handle a kitchen facelift, we're thinking about:
Consistent spacing and alignment on every pull and knob
Proper backing and support for crown molding so it doesn't sag or crack over time
Paint-grade vs. stain-grade trim decisions based on your existing finishes
Electrical upgrades if you want to add under-cabinet lighting (we work with licensed electricians on our team)
We've seen too many DIY kitchen updates that look great in the Instagram photo but fall apart six months later. Hardware pulling out because the screws weren't long enough. Crown molding with visible gaps. Paint jobs that didn't account for Utah's dry climate and now have cracks everywhere.
We do it right the first time. And if you bundle multiple upgrades: hardware, trim, maybe some hard water-damaged fixtures swapped out while we're at it: you save on trip fees and get a cohesive result.
Speed and Sanity: Days, Not Months
Let's talk timelines.
A full kitchen gut job in the Salt Lake Valley typically takes 8 to 12 weeks. That's three months of:
No functional kitchen
Dust everywhere
Coordinating multiple subcontractors
Living on takeout or camping out in your dining room with a hot plate
A kitchen facelift with Your Handyman Pros? A few days. Maybe a week if we're adding lighting and doing extensive trim work.
You'll still have a working kitchen. We'll protect your counters and floors. We'll clean up at the end of each day. And when we're done, your kitchen will feel completely different: without the months of chaos.
This is especially valuable for families in Herriman, Sandy, or Draper who are juggling work, kids, and life. You don't have the bandwidth for a three-month construction zone. But you do have the bandwidth for a long weekend project that makes your kitchen feel brand new.
When a Full Gut Remodel Actually Makes Sense
We're not here to oversell you. If your kitchen genuinely needs a full remodel, we'll tell you.
A full gut renovation makes sense when:
Your layout is cramped or dysfunctional and you want to move walls or appliances
Your cabinets are damaged, warped, or falling apart
You're dealing with plumbing or electrical issues that require opening walls anyway
You want to add square footage, an island, or completely change the footprint
The YHP Sweet Spot: Making Existing Spaces Feel New
This is what we do best. Not gut jobs. Not new construction. But transforming the space you already have into something that feels intentional, modern, and high-end.
We've helped homeowners across the Salt Lake Valley turn builder-grade kitchens into showpieces with:
Modern hardware in finishes that match their style
Crown molding and trim details that add custom appeal
Under-cabinet lighting for functionality and ambiance
Fresh paint on walls and ceilings to brighten the whole space
Small fixes bundled in: like fixing that one drawer that sticks or patching the drywall where the old backsplash came off
It's the same philosophy we bring to every project: high-impact results without high-impact chaos. Whether it's window trim upgrades or making one room feel new, we're all about working smarter, not harder.
Ready to Give Your Kitchen a Facelift?
If you've been putting off a kitchen update because you thought it meant months of construction and a five-figure budget, it's time to rethink that.
A smart kitchen facelift can give you the transformation you want: without the gut-job nightmare. New hardware, strategic trim work, and professional installation make all the difference. And with a licensed contractor (that's us) handling the details, you get a result that looks intentional and lasts.
Let's talk about your kitchen. We serve the entire Salt Lake Valley: from Sandy and Draper to Herriman and beyond. Whether you're ready to book or just want to explore what's possible, reach out to Your Handyman Pros and let's make your kitchen feel new again.

Hard Water Havoc: How to Save Your Salt Lake Fixtures from Mineral Buildup
Hard Water Havoc: How to Save Your Salt Lake Fixtures from Mineral Buildup
If you live in Salt Lake City, Sandy, Draper, Herriman, or Bountiful, you've seen it. That chalky white crust around your faucets. The showerhead that's shooting water sideways instead of straight down. The bathroom fixtures that look dingy no matter how much you scrub them.
Welcome to life with Utah's notoriously hard water. And while those crusty deposits look bad, the real damage is happening where you can't see it, inside your valves, pipes, and fixtures.
The good news? You don't need to live with it. Let's talk about what hard water is actually doing to your home, when you can fix it yourself, and when it's time to call in a pro with the right tools and licensing to solve the problem for good.
What Makes Utah's Water So "Hard"?
Hard water isn't dirty water, it's water that's loaded with dissolved minerals, mainly calcium and magnesium. As water travels through Utah's limestone and mineral-rich soil, it picks up these minerals like a sponge. By the time it reaches your home, it's carrying a heavy payload.
The Salt Lake Valley is among the hardest municipal water supplies in the U.S. According to the U.S. Geological Survey, our water regularly clocks in at 12-18 grains per gallon (gpg) range, well into the "very hard" category. Anything above 10.5 gpg is considered very hard.
So when you see those white, crusty spots on your faucets and showerheads, you're looking at calcium carbonate and magnesium deposits that have been left behind as water evaporates. It's basically the same stuff that forms stalactites in caves. Except it's forming in your plumbing. Scale buildup can restrict flow and stress valves and fittings over time. In some systems, mineral deposits combined with other water chemistry factors can contribute to premature wear or leaks.
The Damage You Can See
The most obvious sign of hard water damage is the visible buildup on faucets, showerheads, and glass shower doors. It starts as a light white film and gradually builds into thick, crusty deposits that won't come off with regular cleaning.
Showerheads are usually the first casualties. The mineral buildup clogs the tiny spray holes, reducing water pressure and causing water to spray in random directions. You might notice some holes stop working altogether. Eventually, the whole showerhead can get so clogged it's basically useless.
Faucet aerators suffer the same fate. That little screen at the end of your faucet is designed to mix air with the water for a smooth, splash-free flow. But when it's clogged with minerals, water sprays everywhere or just trickles out weakly.
Chrome and brushed nickel finishes can develop permanent etching and staining from hard water. What starts as surface buildup can actually eat into the finish over time, leaving dull spots that no amount of polishing will fix.
The Damage You Can't See (Until It's Too Late)
Here's where hard water gets expensive. While you're busy scrubbing the outside of your fixtures, minerals are building up inside your valves and supply lines.
Cartridge valves in single-handle faucets are especially vulnerable. Minerals creep into the tight spaces around the cartridge, making it harder and harder to turn the handle. Eventually, the handle won't budge at all, or worse, it breaks off entirely when you force it.
Shut-off valves under sinks and behind toilets can "freeze" in place from mineral buildup. You won't know there's a problem until you need to turn the water off for a repair, and the valve won't turn. At that point, you're either breaking something or calling in a plumber to replace the valve entirely.
Internal corrosion is another silent killer. Calcium deposits inside pipes can create rough surfaces that accelerate corrosion, especially in copper and galvanized pipes. This can lead to pinhole leaks that don't show up until water starts dripping through your ceiling.
In homes with hard water, we often see leaks that start as slow drips inside walls, by the time you notice water damage, the problem has been going on for weeks or months.
DIY Fixes: When Vinegar Is Your Friend
Not every hard water problem requires a service call. If you catch buildup early, there are some effective DIY solutions.
For showerheads and faucet aerators: Unscrew them and soak them in white vinegar for 30 minutes to an hour. The acetic acid in vinegar dissolves calcium carbonate beautifully. Use an old toothbrush to scrub away loosened deposits, rinse thoroughly, and reinstall. If you can't remove the showerhead, fill a plastic bag with vinegar, secure it over the showerhead with a rubber band, and let it soak overnight.
For visible buildup on chrome fixtures: Spray with a 50/50 mix of white vinegar and water, let it sit for a few minutes, then wipe clean with a microfiber cloth. For stubborn deposits, make a paste with baking soda and vinegar, apply it to the buildup, let it fizz for a few minutes, then scrub gently and rinse.
For glass shower doors: Use a commercial hard water remover or the vinegar spray method. A squeegee after every shower prevents new buildup, annoying, yes, but way easier than scrubbing later.
Safety note: Never mix vinegar with bleach-based cleaners, as it can create dangerous fumes in the form of chlorine gas.
When to Call in a Pro
Here's the hard truth: if you're dealing with frozen valves, leaking fixtures, or constant reclogging despite your best cleaning efforts, DIY isn't going to cut it. You need a licensed plumber who can assess the damage and replace compromised parts correctly.
Valve replacements aren't difficult for a pro, but they require shutting off water to your home, draining lines, and making sure everything is sealed properly when reassembled. One small mistake and you've got water spraying everywhere, or worse, a slow leak inside a wall that you won't notice until it causes real damage.
Fixture swaps are similar. Sure, you can replace a faucet yourself, but if the supply lines are corroded or the mounting hardware is compromised by mineral buildup, you might be in over your head fast. A licensed plumber knows how to spot secondary issues before they become leaks.
At Your Handyman Pros, we work with licensed plumbers who handle valve replacements, fixture installs, and supply line repairs the right way. Because we're a B100 licensed General Contractor, we coordinate the trades so you get a complete solution: not just a Band-Aid fix.
The Long-Term Fix: Water Softeners and Preventative Maintenance
If you're serious about protecting your plumbing, the single best investment you can make is a whole-home water softener. These systems use ion exchange to remove calcium and magnesium from your water before it ever reaches your fixtures. No more crusty buildup. No more clogged showerheads. No more internal valve damage.
Water softeners aren't cheap: expect to spend $1,500–$3,000 for a quality system and professional installation. But when you consider the cost of replacing corroded pipes, damaged fixtures, and water-stained finishes, it pays for itself pretty quickly.
Not ready to commit to a softener? There are intermediate steps that can help:
Lower your water heater temperature. The hotter the water, the faster minerals precipitate out and form deposits. Keeping your water heater at 120°F instead of 140°F slows down buildup without sacrificing comfort.
Wipe down fixtures after use. This sounds tedious, but it works. If water doesn't dry on the surface, minerals can't deposit. A quick wipe with a microfiber cloth takes 10 seconds and prevents hours of scrubbing later.
Install faucet filters to capture some of the minerals before they reach aerators. These aren't as effective as a whole-home system, but they're cheap and easy to replace. Still, faucet-mounted filters improve taste and odor but do very little to reduce hardness minerals. For scale control, you’ll need a softener or a certified scale-reduction system.
The YHP "Fixture Audit" Advantage
Here's something most homeowners don't think about: if we're already at your house fixing a door, repairing trim, or handling another handyman task, we can do a quick fixture audit at no extra charge.
We'll check your showerheads, faucet aerators, and visible valves for signs of hard water damage. If we spot early buildup, we can clean it on the spot. If we see a valve that's about to fail or a faucet that's leaking around the base, we can flag it before it becomes an emergency.
This is especially valuable in homes around Herriman, Riverton, and West Valley City, where hard water issues are at their worst. Catching problems early means fixing them while they're still cheap and easy: not after they've caused water damage or turned into an emergency shutoff situation at 9 p.m. on a Sunday.
And because we work with licensed plumbers, if we do find something that needs professional attention, we can get it handled fast: no hunting for a plumber, no scheduling nightmares, no dealing with multiple contractors.
Simple Maintenance You Can Do Right Now
You don't need to wait for a pro visit to start protecting your fixtures. Here are three things you can do this week:
Check your aerators. Unscrew the aerator from every faucet in your house and look for white buildup. If you see any, soak them in vinegar and scrub them clean. Do this every 3–6 months.
Test your shut-off valves. Gently turn the water shut-off valves under sinks and behind toilets a quarter-turn, then turn them back. If they're stiff or won't move, don't force them: call a plumber before you need them in an emergency. If a valve hasn’t been exercised in years, verify where your main shutoff is and have someone on standby so you don't end up in a panic situation.
Inspect your showerheads. If you're seeing reduced pressure or weird spray patterns, remove the showerhead and check for mineral buildup. Clean or replace as needed.
These small maintenance tasks take less than 30 minutes total and can save you hundreds of dollars in fixture replacements down the road.
When "Good Enough" Isn't Good Enough
Look, we get it. Homeownership is expensive, and it's tempting to let little things slide. But hard water damage is one of those slow-burn problems that can get a bit pricey if you ignore it for too long.
A $15 bottle of CLR and some elbow grease can handle surface buildup. But a frozen valve that needs replacing? That's $150–$300 for parts and labor. A corroded supply line that bursts inside your wall? That's thousands in water damage repair.
If you're in Sandy, Draper, or anywhere else in the Salt Lake Valley and you've been putting off fixture repairs because you're not sure what needs fixing or how much it'll cost, give us a call. We'll take a look, give you an honest assessment, and handle it right: with licensed pros, fair pricing, and no runaround.
Utah’s hard water isn’t changing anytime soon. But the damage it causes? That's totally preventable.

10 Small Issues That Quietly Tank Your Home's Value
10 Small Issues That Quietly Tank Your Home's Value
You know that sinking feeling when you get an appraisal back and it's $15K lower than expected? Or when a buyer's inspector finds a laundry list of "minor issues" that suddenly become major negotiating points?
Here's the thing about home value: it's not just about square footage and bedroom count. It's about a thousand tiny signals that whisper to buyers and appraisers: "This home has been loved" or "This place has been neglected."
Let's talk about the sneaky culprits that are quietly tanking your home's worth (and what we can do about them).
1. Chipped Paint & Peeling Trim
First impressions aren't just important: they're worth actual dollars. When buyers pull up and see chipped paint on your front door or peeling trim around windows, their brain immediately jumps to: "What else haven't they maintained?"
It doesn't matter if the rest of your house is pristine. That flaking paint on the door frame screams neglect louder than anything else.
The Fix: Fresh paint is a Saturday afternoon project that can add improve perceived condition and buyer confidence. But here's the pro tip: don't just slap paint over failing surfaces. As a licensed contractor, we always make sure we're scraping, priming, and addressing the why behind the peeling. Is it moisture? Bad prep work the first time? Salt Lake's intense UV exposure? Fix the root cause, not just the symptom.
2. Dated Cabinet Hardware
Walk into any kitchen with old brass or plastic handles from 1995, and suddenly the whole room feels like it's stuck in a time warp. It's wild how something as small as cabinet hardware can age a space by decades.
Buyers, especially in competitive markets like Draper and Sandy, are looking for move-in-ready homes. When they see outdated hardware, they start mentally calculating renovation costs.
The Fix: Swapping out cabinet hardware is one of the easiest upgrades in the book. For a couple hundred bucks in materials and an afternoon of work, you can transform a kitchen from "grandma's house" to "modern farmhouse chic." We usually recommend brushed nickel or matte black finishes: they're timeless and work with most color palettes across Salt Lake Valley homes.
3. Cracked or Moldy Grout
Here's where things get tricky. Even if you know it's just old grout that needs replacing, buyers and inspectors see cracked or moldy grout and immediately think: "Moisture problem. Hidden mold. Expensive fix."
Bathroom grout issues are value killers because they suggest bigger problems lurking behind the walls.
The Fix: Don't just scrub and hope for the best. We remove the old, compromised grout, check for any actual moisture issues (rare, but worth verifying), and regrout properly with mildew-resistant products. It's a small job that protects your value and gives buyers peace of mind.
4. Flickering Lights or Loose Outlets
Electrical quirks are buyer kryptonite. That flickering light in the hallway? To you, it's annoying. To a buyer, it's a potential fire hazard and a sign that the whole electrical system might be outdated.
Loose outlets have the same effect: they make people wonder if the wiring is sound throughout the house.
The Fix: This is where having a B100 General Contractor matters. We work with licensed electricians that can diagnose whether it's just a loose bulb connection or something more serious. Sometimes it’s a simple fix like a loose connection or failing switch, but electrical issues should always be properly diagnosed. If there is a bigger issue, we work with people who are licensed to handle it properly. No homeowner should be touching electrical without knowing what they're doing, especially in older Salt Lake Valley homes that may have aluminum branch wiring or outdated panels.
5. Squeaky or Sticky Doors
Ever notice how squeaky floors and sticky doors make a house feel... old? Like it's settled too much? Buyers notice too.
These small annoyances signal to people that the home has structural issues (even if it doesn't) or hasn't been maintained. Plus, they're genuinely irritating to live with.
The Fix: Most squeaky hinges need oil. Sticky doors usually need adjustment or planing. Sometimes it's humidity, sometimes it's settling, sometimes it's just old hardware. We can diagnose and fix these issues in minutes per door, but the psychological value boost is huge.
6. Overgrown or Unkempt Landscaping
Curb appeal is literally the front door to your home's value. When buyers see overgrown shrubs, dead patches in the lawn, or weeds taking over flower beds, they make snap judgments about the entire property.
In Herriman and West Valley City, where newer subdivisions have pristine landscaping, a neglected yard sticks out even more.
The Fix: You don't need a complete landscape overhaul. Often, it's just trimming overgrowth, adding fresh mulch, edging beds, and cleaning up debris. We bundle curb appeal projects all the time: power washing the driveway, refreshing mulch, and trimming hedges can be done in a day and completely transforms how a home presents.
7. Minor Water Stains
This one's frustrating because you know the leak is fixed. You replaced that pipe two years ago. But that yellowish stain on the ceiling? It's still there, screaming "ACTIVE WATER PROBLEM" to every buyer and inspector who walks through.
Water stains are deal-breakers. Even when you explain they're old, buyers don't believe it.
The Fix: After confirming the leak is actually resolved, we prime with stain-blocking primer (regular paint won't cut it) and repaint the affected area. Sometimes drywall repair is needed if there's texture damage. It's a small investment that removes a massive red flag from your home inspection report.
8. Loose Handrails
From a safety standpoint, this one's serious. Loose handrails: especially on stairs: are immediate safety hazards that home inspectors will flag in their reports.
For buyers with kids or elderly family members, a wobbly handrail can be a dealbreaker.
The Fix: Handrails need to be anchored properly into studs or blocking. As a licensed contractor in Salt Lake Valley, we make sure handrails are secured properly to structural framing and are aligned with current safety standards. It's not just about passing inspection; it's about actual safety.
9. Old, Cracked Caulking
Caulking seems like such a minor detail until you realize how much visual weight it carries. Cracked, yellowed, or missing caulk around tubs, showers, and windows looks messy and: again: suggests moisture problems and poor maintenance.
The Fix: Removing old caulk and applying fresh, clean lines takes skill (it's harder than it looks to get perfect beads), but the visual transformation is immediate. We use high-quality, mold-resistant caulk in bathrooms and paintable caulk around windows and trim. It's one of those finishing touches that separates professional work from DIY attempts.
10. Visible Exterior Wear
Faded shutters, cracked siding, peeling window trim: these exterior details quietly communicate that a home hasn't been maintained. In Salt Lake Valley's intense sun and temperature swings, exterior materials take a beating. When buyers see visible wear, they start budgeting for a full exterior refresh.
The Fix: Depending on the material, repairs range from simple repainting to replacing damaged sections. We've worked on everything from vinyl siding replacement to wood trim restoration to shutter painting across Riverton, Magna, and Sandy. Sometimes a power wash and targeted repairs are all you need. Other times, strategic replacement of the most visible damaged sections gives you the biggest bang for your buck.
The Your Handyman Pros Advantage: Bundle & Save
Here's what sets us apart as a B100 General Contractor: we don't just "patch" individual issues. We look at the whole picture and find the root causes.
When we do a pre-sale or home refresh package, we're bundling these small fixes strategically. Instead of five separate service calls (and five separate trip charges), we knock out your chipped trim, loose handrails, cracked caulk, dated hardware, and water stain repair in one or two efficient visits.
The result? Higher perceived value, cleaner inspection reports, and less negotiating leverage for buyers who want to nickel-and-dime you.
Homeowners can strengthen their negotiating position in a sale by simply eliminating easy inspection flags. That's real money coming into your pocket.
Don't Wait Until Listing Day
The best time to handle these issues is before you decide to sell. Even if you're staying put for years, these small problems compound over time. That hairline crack in the grout becomes a moisture problem. That loose handrail becomes a liability. That chipped paint leads to wood rot.
Prevention is always cheaper than repair. And when you do eventually sell? You'll thank yourself for maintaining these details.
If you're in Sandy, Draper, Herriman, Riverton, West Valley City, Magna, or anywhere in the Salt Lake Valley and you're noticing these small issues piling up, let's talk. We offer free estimates and can create a custom package that addresses your home's specific needs: whether you're prepping to sell or just want to protect your investment.
Because at the end of the day, your home's value isn't just about the big stuff. It's about a thousand small details working together to tell a story of a well-loved, well-maintained home.
Ready to protect your home's value? Contact Your Handyman Pros today for a free assessment.
Your Handyman Pros | Licensed General Contractor #12888335-5501 | Serving the Salt Lake Valley
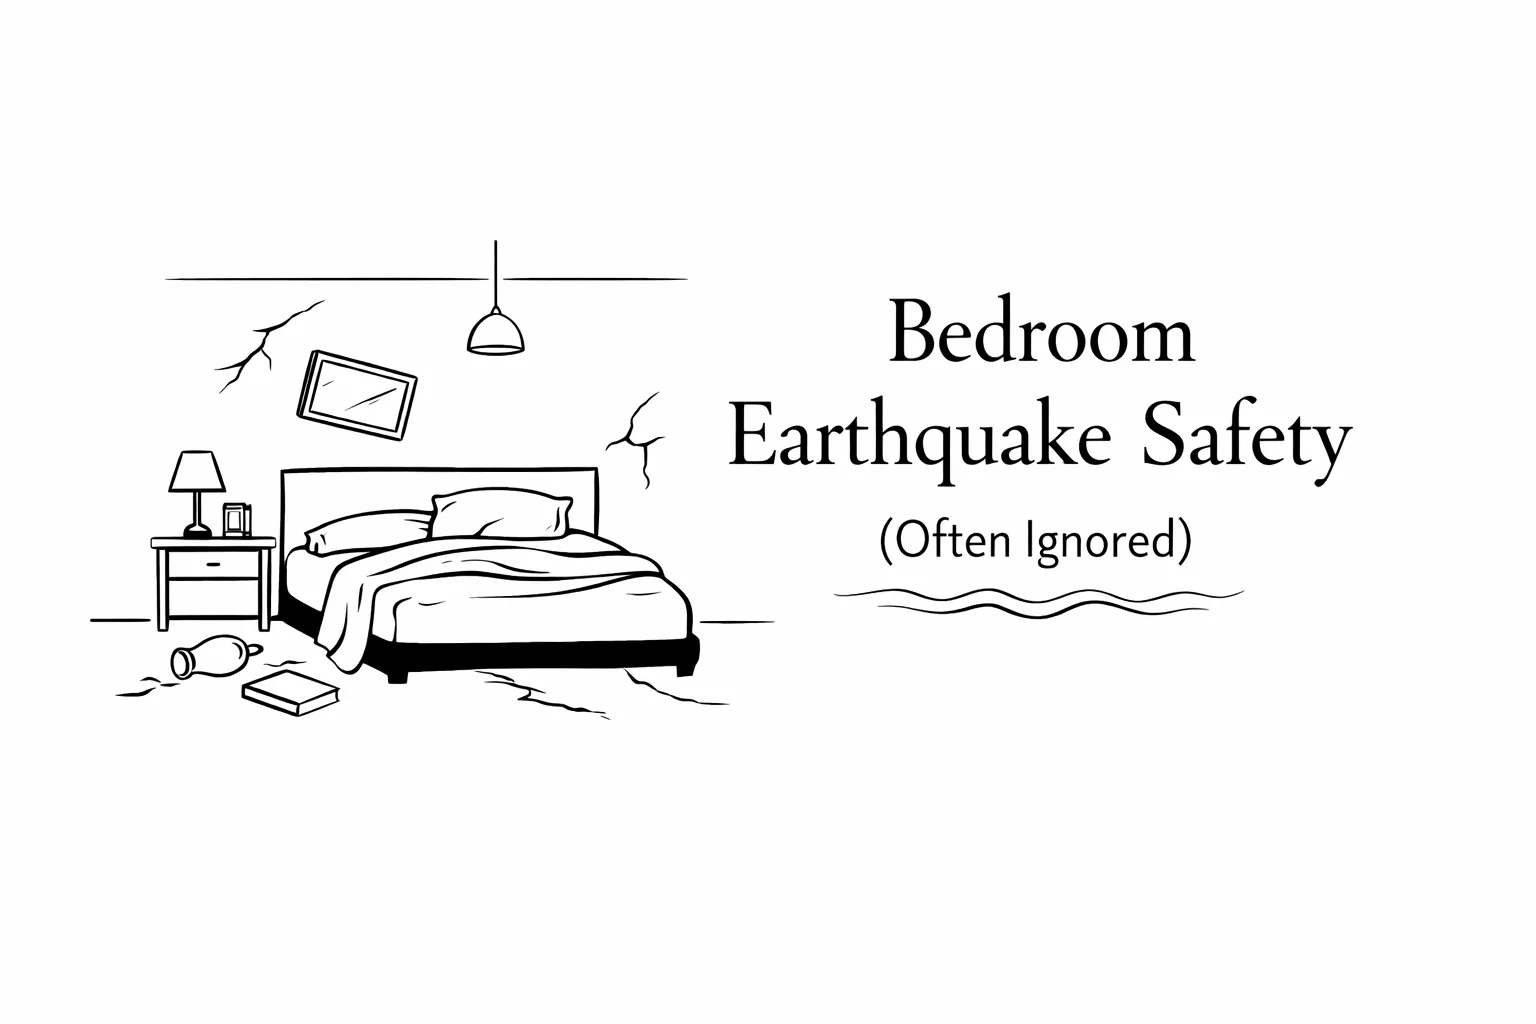
Bedroom Earthquake Safety (Often Ignored)
Bedroom Earthquake Safety (Often Ignored)
We spend about a third of our lives in our bedrooms. Yet when it comes to earthquake prep in the Salt Lake Valley, most homeowners focus on securing the living room TV and kitchen cabinets: and completely forget about the room where they're most vulnerable.
Here's the thing: if an earthquake hits at 2 a.m., you're not standing in your living room ready to "drop, cover, and hold on." You're asleep, disoriented, probably barefoot, and surrounded by hazards you've never thought twice about. That heavy mirror hanging over your bed? The tall dresser that's never been anchored? The window right next to your pillow? They all become serious risks the moment the ground starts shaking.
Let's talk about the bedroom safety upgrades that most people in Sandy, Draper, and Bountiful overlook: and how a few simple fixes can make a huge difference.
Why Your Bedroom Is the Most Dangerous Room During an Earthquake
When earthquakes strike while you're asleep, your bedroom transforms from a peaceful retreat into a hazard zone in seconds. Unlike daytime scenarios where you might have shoes on and be mentally alert, nighttime earthquakes catch you at your most vulnerable.
You're dealing with:
Broken glass on the floor (from picture frames, mirrors, or windows)
Total darkness if the power goes out
Disorientation from being jolted awake
Furniture that may have tipped and blocked your exit
No access to emergency supplies stored in other rooms
The Wasatch Fault runs right through our backyard here in the Salt Lake Valley, and seismologists estimate a significant earthquake along it is likely within our lifetimes. The time to prepare isn't after the shaking starts: it's right now, while you're thinking about it.
The "Danger Zone" Above Your Head
Let's start with the most overlooked hazard: everything hanging above your bed.
That beautiful oversized mirror from HomeGoods? The gallery wall of framed family photos? The floating shelf with your collection of books and plants? They all need to come down or get seriously upgraded.
Here's why this matters: Most earthquake injuries don't come from buildings collapsing: they come from falling objects. A heavy mirror or large piece of framed art falling from four feet above your head can cause serious injury, even during a moderate earthquake.
Quick Fixes for Above-the-Bed Hazards:
Switch to lightweight decor: Replace heavy mirrors and thick glass frames with lightweight alternatives. Canvas prints, fabric wall hangings, and vinyl decals give you the aesthetic without the risk.
Use seismic hooks and museum putty: If you absolutely must have something above your bed, invest in proper seismic-rated picture hangers (not those little finishing nails that came with the frame). For smaller items, museum putty creates a semi-permanent bond that holds during shaking but can still be removed.
Relocate heavy pieces: The best solution? Move that statement mirror to a wall that's not above a bed, couch, or desk where someone spends time.
Anchoring Tall Furniture: The Safety Upgrade Nobody Thinks About
In bedrooms across Herriman and West Valley City, the biggest falling hazards are dressers, armoires, and tall nightstands that have never been anchored to the wall.
Furniture tip-overs are already major hazard in homes with kids, and earthquakes multiply that risk exponentially. A six-drawer dresser can weigh 200+ pounds, and when it tips during shaking, it doesn't just fall: it launches.
How to Anchor Bedroom Furniture the Right Way:
Invest in proper furniture straps: Forget those flimsy adhesive strips. You want metal L-brackets or heavy-duty furniture straps that bolt into wall studs, not just drywall.
Find the studs: This is where a lot of DIY attempts go wrong. Drywall anchors won't hold during a serious shake. You need to anchor into actual studs for real security. If you're not sure where your studs are or if you're dealing with plaster walls (common in older Salt Lake homes), that's where we come in.
Anchor everything tall: Dressers, wardrobes, tall nightstands, bookcases: if it's taller than three feet and not already built-in, it needs to be secured.
Don't forget the TV: If you have a TV in your bedroom (no judgment), mount it properly or secure it with a strap system. A 55-inch TV becoming a projectile is nobody's idea of a good wake-up call.
The Window Factor: Glass and Bed Positioning
Windows are beautiful. They let in natural light, help with ventilation, and make bedrooms feel bigger. They're also a serious earthquake hazard that most people in Sandy and Draper never consider.
The problem with bedroom windows: When glass shatters during an earthquake, it doesn't just fall straight down: it scatters. If your bed is positioned right next to a window, you could wake up covered in glass shards before you even realize what's happening.
Window Safety Strategies:
Reposition your bed: The easiest fix is to move your bed away from windows. Even two or three feet of distance significantly reduces the risk of glass injuries. If your room layout doesn't allow for much flexibility, consider which wall poses the least risk.
Apply safety film: Clear window safety film won't stop a window from breaking, but it holds the glass together when it shatters, preventing it from becoming projectile shrapnel. This is especially important for large bedroom windows or sliding glass doors that lead to balconies.
Keep curtains or blinds closed at night: Heavy curtains or blinds can catch some of the glass if a window breaks, adding a small layer of protection.
Consider the view vs. the risk: I know: your mountain view is gorgeous. But if your headboard is directly under a big picture window, that's a safety trade-off worth reconsidering.
Clear Exit Paths: Don't Block Your Way Out
Imagine this: the ground is shaking, the power's out, and you need to get out of your bedroom right now. Can you do it?
If your tall bookcase is positioned where it could fall and block the door, or if there's a pile of storage bins between your bed and the exit, you've got a problem.
Creating Safe Exit Routes:
Map your escape path: Walk from your bed to your bedroom door in the dark (seriously, try it tonight). Are there obstacles? Could furniture fall and block your path?
Keep the area near your door clear: Don't store things right by the door that could become obstacles or fall and jam it shut.
Position tall furniture away from doorways: If that armoire falls, make sure it falls away from your exit, not across it.
Consider a bedside flashlight: A headlamp or flashlight in your nightstand drawer (or better yet, mounted to the wall within arm's reach) makes a huge difference when you're trying to navigate in total darkness.
The Peace of Mind Upgrade: When to Call in the Pros
Most of these bedroom safety upgrades are totally DIY-friendly if you're handy with a drill and a stud finder. But there are situations where it makes sense to bring in professionals: especially here in the Salt Lake Valley where many homes have unique challenges.
Here's when Your Handyman Pros can help:
Custom built-ins and heavy furniture: If you have custom closet systems, built-in wardrobes, or furniture that weighs several hundred pounds, proper anchoring requires more than just basic straps. Our team (we're B100 General Contractors) can assess the load, find the right structural attachment points, and ensure everything is secured properly.
Older homes with plaster or lathe walls: Many homes in older Salt Lake neighborhoods have plaster walls, which require different anchoring techniques than modern drywall. We know how to work with these walls without causing damage.
Structural concerns: If you're worried about more than just falling objects: maybe you have cracks in your walls, or you're concerned about your home's overall seismic resistance: our contractor background means we can evaluate structural issues, not just hang a mirror securely.
Window safety film installation: While this seems straightforward, proper installation of safety film requires careful prep, the right tools, and a dust-free environment. We can handle it without bubbles, peeling, or that DIY "I'll fix it later" promise you make to yourself.
The Bottom Line on Bedroom Earthquake Safety
Look, we can't predict when the next earthquake will hit the Wasatch Front. But we can control how prepared our homes are when it does.
Your bedroom should be your safest space: the place where you rest, recharge, and feel secure. Taking an afternoon to anchor furniture, relocate heavy mirrors, and think through exit paths isn't just about earthquake prep. It's about creating a truly safe environment for your family.
Most of these fixes cost less than a dinner out and take just a couple of hours. And if you're not sure where to start, or if you've got unique challenges in your Magna, Riverton, or Bountiful home, we're here to help.
Ready to make your bedroom earthquake-safe? Give Your Handyman Pros a call. We'll walk through your space, identify the biggest risks, and help you create a safer sleep environment: whether that's a quick consultation or a full safety upgrade. Because when it comes to protecting your family, "I'll get to it eventually" isn't a plan.
Let's get it done right.

Earthquake-Proofing Your Living Room: A 2-Hour Safety Upgrade
Earthquake-Proofing Your Living Room: A 2-Hour Safety Upgrade
Let's talk about something most Salt Lake Valley homeowners don't think about until it's too late: earthquakes. Seismologists consider a major Wasatch Fault earthquake likely in our lifetime. And while we can't control the tremors, we can control what happens inside our living rooms when they hit.
The good news? You can knock out the most important safety upgrades in about two hours over a weekend. No special skills required. Just a little muscle, a few inexpensive supplies from the hardware store, and the peace of mind that your family room won't turn into a hazard zone during the next shake.
Here's how to earthquake-proof your living room: fast.
1. Secure the Big Screen (Before It Becomes a Flying Object)
Your 65-inch TV is the centerpiece of your living room. It's also a 40-pound projectile waiting to happen.
If your TV is sitting on a console or entertainment stand, it's not secure: no matter how stable it looks. During even a moderate earthquake, that thing can tip forward, slide off, or topple completely.
The quick fix: TV anti-tip straps. These are inexpensive (under $15), take about 10 minutes to install, and they're almost invisible once they're on. The straps attach to the back of your TV and anchor to either the wall behind it or the console itself. If you have drywall, make sure you're hitting a stud. If you're not confident finding studs, a simple stud finder from any hardware store will do the trick.
The better fix: Wall-mount your TV. This is the gold standard for earthquake safety, and it also frees up floor space and looks cleaner. If you've got the skills and the right mount, you can DIY this. But if drilling into studs and running cables through walls sounds like a headache, that's literally what we do at Your Handyman Pros.
2. Anchor the "Towering" Furniture
Bookshelves. Armoires. That tall IKEA cabinet you swore you'd secure "eventually." These are the biggest dangers in your living room during an earthquake, and they're one of the most common causes of earthquake injuries inside homes.
A six-foot bookshelf fully loaded with hardcovers weighs hundreds of pounds. When it tips, it doesn't just fall: it crushes. And it tips easier than you think.
The fix: Furniture anchor straps. These are L-brackets or nylon straps that attach the top of the furniture to the wall. You'll want to anchor into studs, not just drywall, so the anchor doesn't rip out under stress.
Most straps come in kits for under $20 and include everything you need. Measure twice, drill once, and make sure the furniture is level before you tighten everything down. This takes about 15–20 minutes per piece of furniture, and it could literally save a life.
Pro tip for renters: If you can't drill into the walls, consider earthquake-resistant tension poles that go between the top of the furniture and the ceiling. They're not as secure as wall anchors, but they're way better than nothing.
3. Heavy Art and Mirrors: Stop Hanging Things on Hope
We've all done it. You hammer a nail into the drywall, hang a heavy mirror or a big canvas print, and call it good. That works fine: until the house starts shaking.
Heavy items hung on standard picture nails or regular hooks can swing, fall, or even launch off the wall during seismic activity. If that 30-pound mirror is hanging above your couch, you've got a problem.
The fix: Swap out standard picture hangers for seismic hooks or heavy-duty wall anchors. Seismic hooks have a closed loop design that prevents the hanging wire from bouncing off during shaking. They're cheap, they're easy to find, and they work.
For anything over 15 pounds, mount directly into a stud using a heavy-duty screw. Use a level, a stud finder, and take your time. If the artwork or mirror is particularly large or valuable, it's worth having a pro handle it. We've done plenty of wall work across the Salt Lake Valley, and getting heavy décor properly anchored is one of those "measure twice, drill once" jobs.
4. Glassware & Display Cabinets: Add Latches, Save the Heirlooms
China cabinets, curio shelves, glass-front display cases: they're beautiful, but they're also full of breakable, sometimes irreplaceable items. During an earthquake, cabinet doors swing open, and everything inside becomes a mess of broken glass and shattered memories.
The fix: Cabinet latches. You can get low-profile magnetic latches or simple twist locks that keep cabinet doors closed during shaking. These take about 5 minutes per door to install, and they're practically invisible when closed.
Bonus upgrade: Line the shelves inside your cabinets with non-slip shelf liner. This keeps dishes, glassware, and collectibles from sliding around or tipping over. It's a $10 roll of grippy material that you just cut to size and lay down. Easy.
And if you've got particularly valuable or sentimental items on display? Use museum putty to secure them to the shelf surface. Museums use this stuff to keep artifacts in place, and it works just as well for your grandma's porcelain figurines.
5. The "Big Picture" Structural Safety Check
Here's where things get real. All the TV straps and cabinet latches in the world won't help if your house has foundational issues, outdated earthquake retrofitting, or structural weaknesses.
If your home was built before modern seismic building codes (we're talking pre-1980s in many cases), it might not be properly bolted to its foundation. Older homes in Bountiful, Sandy, and parts of the Salt Lake Valley often have cripple walls in the crawl space that aren't braced. During a major earthquake, these walls can collapse, and the entire house can slide off the foundation.
This is not a DIY job.
If you're concerned about your home's structural earthquake readiness, you need someone with a B100 General Contractor license: someone who understands foundations, framing, and code requirements. That's us. We work with pros who can assess your home's structural integrity, recommend retrofitting if needed, and handle the heavy-duty work that keeps your family safe.
We're talking foundation bolting, cripple wall bracing, and making sure your home can handle the Big One when it comes. While a larger project might take more time, you can still do a walkthrough yourself over the weekend.
Two Hours, A Few Supplies, and Serious Peace of Mind
You don't need a full weekend or a giant budget to make your living room significantly safer. Most of these upgrades: TV straps, furniture anchors, seismic hooks, and cabinet latches: cost less than $100 total and take just a couple of hours to complete.
But here's the thing: if you're looking at your bookshelf, your TV, and that heavy mirror above the couch and thinking, "I really should do this, but I'm not sure I'll do it right": just call us.
We can handle these kinds of safety upgrades for homeowners in Herriman, Draper, Sandy, West Valley City, and across the Salt Lake Valley. We've got the tools, the know-how, and the speed to knock out a whole checklist of earthquake safety fixes in one visit. And if there's a bigger structural concern? We've got the licensing and expertise to handle that, too.
Because at the end of the day, earthquake-proofing your living room isn't about being paranoid. It's about being prepared. And in Utah, that's just smart homeownership.
Ready to make your home safer? Give us a call or check out more of our Pro Tips and Projects for ways to protect and improve your home.
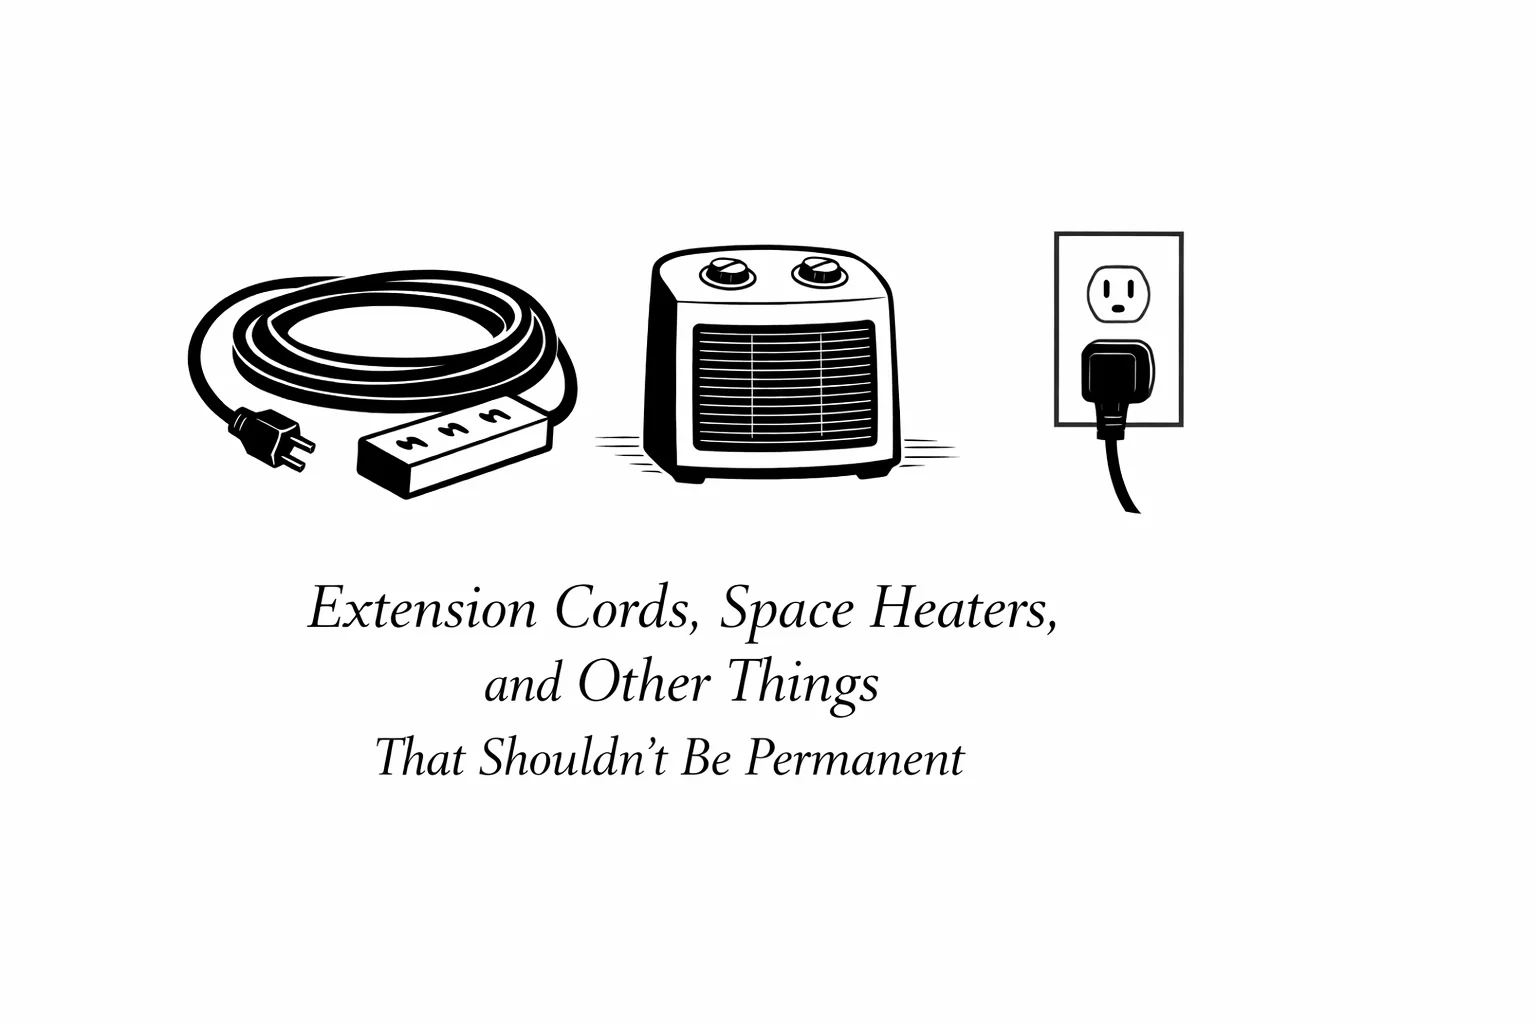
Extension Cords, Space Heaters, and Other Things That Shouldn't Be Permanent
Extension Cords, Space Heaters, and Other Things That Shouldn't Be Permanent
Look, we've all been there. You plug in a lamp with an extension cord because the outlet's on the wrong side of the room. A week goes by. Then a month. Then suddenly that orange cord snaking under your rug has been there since Halloween... of 2024.
Here's the thing: temporary fixes are great for getting through the day. But when they become permanent members of your household? That's when things get dicey, and in some cases, downright dangerous.
As a B100 General Contractor serving the Salt Lake Valley, we've seen some homes where "temporary" solutions have been running the show for years. And I get it, you're busy, it works well enough, and calling someone feels like overkill.
But some of these band-aids? They're fire hazards. Code violations. Accidents waiting to happen.
Let's talk about the most common offenders and why it's time to upgrade from MacGyver to actually-safe.
The Extension Cord Trap: When Temporary Becomes a Ticking Clock
Extension cords are the poster child for "just for now" turning into "just forever." You run one to power a reading lamp. Then it stays. You tuck it under the edge of the rug so nobody trips. Then it really stays.
Here's what most people don't realize: extension cords are designed for temporary use only. They're not built to handle the constant electrical load that permanent wiring can. When cords are overloaded, pinched, or trapped under rugs where heat can't dissipate, they can overheat and become a fire hazard.
Electrical failures and malfunctions cause tens of thousands of home fires each year nationwide, and misuse of cords and outlets is a contributing factor.
If you've got a cord that's been "temporarily" powering something in your Herriman or Sandy home for more than a few weeks, it's time to have a real outlet installed. It's not just safer, it's also cleaner, more convenient, and it won't fail your next home inspection.
Space Heater Burnout: The $30 Solution That's Costing You Safety
Space heaters are lifesavers when you've got a cold bedroom or a drafty office. But they're supposed to be temporary warmth, not a full-time replacement for a functioning HVAC system.
Here's the problem: space heaters draw massive amounts of power. We're talking 1,500 watts on average. That's more than your fridge, your microwave, and most of your other appliances. When you plug one into an outlet that's already handling a lamp, a phone charger, and your laptop, you're overloading that circuit.
And if you're running that space heater day and night because one room in your house is just always freezing? You're not solving the problem, you're masking it while racking up your electric bill and melting your outlet.
Some homes wind up literally scorched because a space heater was plugged into the same power strip as everything else. The plastic around the plug starts to discolor. The prongs get hot to the touch. Eventually, something gives.
Never plug a space heater into an extension cord or power strip. It should go directly into a wall outlet, and ideally, the heater should be the only high-draw device on that circuit.
But here's the bigger question: why is that room so cold in the first place?
If you've got a bedroom that's perpetually 10 degrees colder than the rest of your house, that's an HVAC issue, not a space heater issue. Maybe the ductwork isn't balanced. Maybe insulation is missing. Maybe a vent got closed and nobody noticed. Your Handyman Pros can coordinate with licensed HVAC pros to figure out the root cause and fix it the right way, so you're not living with a fire hazard every winter.
Daisy-Chaining Power Strips: The Infinite Power Myth
Let's talk about the power strip situation. You've got one outlet. You need to plug in five things. So you plug a power strip into that outlet. Then you realize you need seven things. So you plug another power strip into the first power strip.
Boom. Infinite power, right?
Wrong. So, so wrong.
Every outlet in your home is rated for a specific amount of electrical load. When you daisy-chain power strips together, you're not creating more capacity, you're just splitting the same limited power across more devices. The outlet doesn't care how many things you've plugged in downstream. It's still delivering the same total wattage.
And when you overload it? The breaker trips if you're lucky. The wiring overheats if you're not.
This is especially common in home offices, entertainment centers, and workshops. The fix? Add more outlets. A licensed electrician can install additional receptacles exactly where you need them, so you're not playing electrical Jenga every time you want to charge your phone.
"Temporary" Structural Fixes: The 2x4 That Became Family
Okay, this one's my personal favorite because it's so common and so ridiculous when you actually say it out loud.
"Yeah, that shelf is held up by a 2x4 wedged between the floor and the bottom. It's been like that for three years. Works great!"
Or: "The door doesn't close right, so we just prop it with a piece of wood."
Or my all-time favorite: "The deck railing was wobbly, so I screwed a brace into it. It's totally fine now."
Here's the thing: temporary structural supports are supposed to be temporary. They're meant to hold something in place while you figure out the real fix. They are not load-bearing members of your home's permanent infrastructure.
That 2x4 propping up your shelf? It's not addressing why the shelf brackets failed in the first place. That door that won't close? There's a reason: maybe the frame shifted, maybe the hinges are loose, maybe the house settled. Propping it open doesn't fix it.
And that deck railing? If it was wobbly, it means the structure underneath isn't sound. Slapping a brace on it might feel secure, but it's not addressing the rot, the loose bolts, or whatever caused the wobble to begin with.
As a licensed and insured General Contractor in Salt Lake Valley, I can tell you that these "fixes" always: always: cost more in the long run. Because by the time you finally call someone, the original problem has gotten worse, and now you're looking at a bigger repair.
Command Hook Overload: When Adhesive Meets Ambition
Command hooks are amazing. They're perfect for hanging lightweight picture frames, small decorations, keys, and other stuff that doesn't need a full wall anchor.
But somewhere along the way, people started using them for everything. Heavy mirrors. Floating shelves loaded with books. Coats. Tool organizers.
Here's the deal: adhesive has limits. It's affected by temperature, humidity, wall texture, and how much weight you're asking it to hold. And in Utah, where we've got dry air, temperature swings, and homes that shift with the seasons, those limits get tested constantly.
If what you're hanging weighs more than a couple pounds, or if it's something you'd be bummed about if it fell (like a TV, a heavy mirror, or grandma's antique clock), it needs a real wall anchor or a screw into a stud.
It takes five minutes. It costs almost nothing. And it won't randomly crash to the floor at 2 a.m. and scare the daylights out of everyone.
The Real Fix: Safety, Code Compliance, and Peace of Mind
Look, I'm not here to shame anyone for running an extension cord or using a Command hook. We've all done it. Life gets busy, and sometimes "temporary" is all you've got time for.
But when temporary becomes permanent, that's when it stops being convenient and starts being a liability: for your safety, your home's value, and your peace of mind.
The good news? Fixing this stuff isn't as expensive or time-consuming as you think. Adding an outlet, repairing a structural issue, or replacing a space heater with proper HVAC work: these are jobs that a licensed B100 General Contractor like Your Handyman Pros handles every single day.
We coordinate the right pros: electricians for outlets and wiring, HVAC specialists for heating issues, finish carpenters for structural repairs: so you're not stuck making five different phone calls and hoping everyone shows up on time.
And because we're licensed and insured, you know the work is getting done to code. That matters when you go to sell your home, when you file an insurance claim, or when you just want to sleep at night knowing your house isn't a fire hazard.
Bottom Line: Fix It Right, or Keep Fixing It Forever
Here's what I tell every homeowner in the Salt Lake Valley, from Sandy to Tooele: temporary fixes are fine for a day, maybe a week. But if you're still working around the same problem six months later, it's not temporary anymore: it's just a problem you haven't solved yet.
Extension cords, space heaters, power strip towers, and structural "supports" that are really just lumber scraps: they all share the same issue. They don't fix anything. They just delay the inevitable.
So if you've got a cold room, an outlet shortage, or a door that won't close right, let's actually fix it. You'll save money in the long run, your home will be safer, and you won't have to explain to your house guests why there's a 2x4 propping up your bookshelf.
Ready to ditch the band-aids? Give Your Handyman Pros a call. We'll get it done right: the first time.
The Hidden Wear Spots in Every Utah Home: What the Seasons Are Doing to Your House
The Hidden Wear Spots in Every Utah Home: What the Seasons Are Doing to Your House
Living in Utah means you get all four seasons, and your house feels every single one of them. From the salty slush of January to the dusty heat of July, our homes take a beating in ways that a lot of folks don't notice until something breaks.
Here's the thing: most homeowners in Sandy, Herriman, Riverton, and across the Salt Lake Valley don't see the damage until it's expensive. A little crack here, some wear there, it all adds up. But if you know where to look, you can catch these "hidden wear spots" before they turn into thousand-dollar repairs.
Your Handyman Pros has been in and out of homes all over Salt Lake County, Davis, Wasatch, Summit, and Tooele for years. As licensed B100 General Contractors, we've seen how Utah's weird weather sneaks up on houses. Let's walk through the spots that take the most abuse, and what you can do about them.
1. The Salt Creep: Door Thresholds and Hardwood Floors
If you live anywhere in Northern Utah, you know the drill: UDOT dumps salt on the roads, you track it inside on your boots, and it gets everywhere. What most people don't realize is that road salt is basically sandpaper mixed with a chemical weapon for your floors.
Door thresholds are the first casualties. That aluminum or wood strip at the bottom of your entry door? Salt eats through the finish, corrodes metal, and makes wood swell and crack. Walk into any home in West Valley City or Magna after a few winters, and you'll see thresholds that look like they've been through a war.
Hardwood floors near entryways take it even harder. The salt tracked in on shoes doesn't just sit there. Salt and snow tracked inside create abrasive grit and moisture that wear down finishes over time, creating a gritty slurry that grinds into the finish every time someone walks over it. Over time, you'll see dull patches, scratches, and even warping where the wood has absorbed moisture and then dried out again.
The fix: Get aggressive with doormats, both outside and inside. Vacuum or shake them out weekly during winter. For thresholds, a quick sand-and-seal every couple of years keeps them looking sharp. If your hardwood is already showing wear, a professional refinish can bring it back. And honestly? If you're dealing with multiple problem spots, bundling them into one service call is way more cost-effective than fixing things one at a time.
2. The "Dry Air" Crack: Caulking Around Tubs, Showers, and Baseboards
Utah's dry air is no joke. We're talking single-digit humidity in the winter, which does a number on any flexible material in your house, especially caulk.
That bead of caulk around your bathtub, shower, and along your baseboards? It's designed to stay flexible and seal out water. But when the air is drier than a stand-up comedian's wit, caulk shrinks, cracks, and pulls away from surfaces way faster than it would in, say, Florida.
Some homeowners ignore tiny cracks in the caulk line because they "don't look that bad." But here's the problem, those cracks let water seep behind the tub or under the baseboards. Give it a few months, and you're looking at mold, rotted framing, or even subfloor damage.
The fix: Re-caulk high-moisture areas every 2-3 years, or sooner if you see cracking. Failed caulk allows moisture intrusion, which can lead to rot or mold over time if not addressed. It's a cheap fix that prevents expensive problems. And if you're already seeing water damage (like soft spots or discoloration), don't wait. The longer water sits, the more expensive the repair gets. Our team can assess whether it's just a caulk job or if there's hidden damage that needs attention. We don't just patch, we figure out why it failed and fix it right.
3. The Snow Line: Where Snow Piles Up Against Your House
This one's sneaky because you won't see the damage until spring, or sometimes not until the next winter when things really start falling apart.
When snow piles up against your house, deck, or fence, it creates a moisture barrier that doesn't dry out. Even when the top layer melts during the day, the snow at the bottom stays frozen, trapping water against wood, siding, and foundation materials. Snow alone shouldn’t cause major damage if materials are properly flashed and elevated, but prolonged moisture exposure will exploit weak details. Over time, this leads to rot, mold, and even structural damage to framing.
Decks are especially vulnerable. Some homes end up with posts or rim joists that are completely rotted out because snow sat against them all winter. Homeowners often have no idea that there's a problem until the deck starts to sag.
The fix: Shovel or brush snow away from your house, especially around deck posts, siding, and foundation walls. If you've got a deck, check the "snow line" area every spring for soft wood, discoloration, or peeling paint. Catch it early, and you're looking at a board replacement. Miss it, and you might be rebuilding the whole structure. If you're unsure, a quick inspection by a licensed contractor can save you a ton of headaches.
4. Dust and Vents: The Silent HVAC Killer
Utah summers are dusty. Like, really dusty. And all that dust has to go somewhere. Spoiler alert: it's clogging up your soffit vents, HVAC system, and furnace filters faster than you think.
When soffit vents get packed with dust, your attic can't breathe. That means your house gets hotter in summer (which makes your AC work harder) and traps moisture in winter (which can lead to mold and insulation damage).
Your furnace filters? If you're running them longer than 30-60 days during peak heating season, you're asking for trouble. A clogged filter makes your HVAC system work harder, shortens its lifespan, and spikes your energy bills. We've seen furnaces in West Valley City and Magna that were working at half capacity just because the homeowner forgot to swap the filter.
The fix: Check your furnace filter monthly. Seriously: set a phone reminder. It takes 30 seconds and costs $5. For soffit vents, a quick blow-out with a leaf blower once a year keeps them clear. If you're not comfortable getting on a ladder, most handyman services (hint, hint) can knock this out as part of a seasonal maintenance visit. If you're doing it yourself, use low-pressure air or gentle brushing to clear vents. Avoid forcing debris deeper into vent openings.
5. High-Traffic "Hand Spots": Door Frames and Cabinet Corners
This one's subtle, but once you see it, you can't unsee it. Look at the area around your door handles, light switches, and cabinet corners. See those dark smudges, dents, and worn-down paint? That's what we call "hand spots."
Every time you grab a door handle, lean on a wall, or bump a cabinet with your hip, you're transferring oils, dirt, and pressure onto the surface. Over months and years, the paint wears down, the wood dents, and everything starts to look... tired.
In high-traffic homes: especially in Riverton and Sandy where families are constantly on the move: these spots make the whole house feel less maintained, even if everything else is clean.
The fix: A quick touch-up with paint or a cabinet hardware swap makes a huge difference. For door frames, a light sand and a fresh coat of trim paint takes 20 minutes per door. For cabinets, replacing old, worn-out handles with modern hardware can make your kitchen feel brand new without the remodel price tag.
If you've got a whole list of these little fixes, bundling them into one service call is the way to go. We can knock out 10-15 of these small repairs in a single afternoon. It's way more efficient (and cheaper) than calling someone out five different times.
Why Catching These Spots Early Matters
Here's the bottom line: small problems become expensive problems when you ignore them. Costs can escalate significantly if small issues go unaddressed. It's generally easier (and cheaper) if you catch a problem early or prevent it with proper maintenance.
Utah's climate is tough on homes. The dry air, the road salt, the freeze-thaw cycles: it all adds up. But if you know where to look and stay ahead of the little stuff, you can keep your home in great shape without blowing your budget.
The Your Handyman Pros Difference
Your Handyman Pros is a licensed B100 General Contractor. We don't just slap some caulk on a problem and call it good. We look at your home as a system: because that leaky shower isn't just a caulk issue, it's a ventilation issue, a grout issue, and maybe even a framing issue.
Whether you're in Herriman, Sandy, Riverton, Magna, West Valley City, or anywhere across the Salt Lake Valley, we've seen it all. And more importantly, we've fixed it all. From window trim upgrades to winter home inspections, we're here to help you stay ahead of the wear and tear that comes with living in Utah.
Ready to tackle those hidden wear spots? Give us a shout. Let's knock out the small stuff before it becomes the big stuff.

The $50 Fixes That Make Your Home Feel Maintained: Big Impact on a Small Budget
The $50 Fixes That Make Your Home Feel Maintained: Big Impact on a Small Budget
You know that feeling when you walk into someone's home and it just feels… taken care of? The doors don't squeak. The hardware matches. Everything looks intentional. That's not always about having a brand-new house or dropping thousands on a remodel. Sometimes, it's just about fixing the little stuff that's been nagging at you since you moved in.
Here's the good news: you don't need a massive budget to make your home in Sandy, Herriman, Riverton, or anywhere across the Salt Lake Valley feel dialed in. Most of the time, it's the $50 fixes: the ones you keep meaning to do but never quite get around to: that make the biggest difference.
Let's talk about the five small upgrades that eliminate what I like to call "house friction" and make your place feel like someone actually lives there (in the best way possible).
1. Swap Out Your Hardware: The Fastest Visual Upgrade
Walk through your house right now and look at your cabinet knobs and drawer pulls. Are they all the same style? Or did the previous owner leave you with a mix of brass, brushed nickel, and that weird antique bronze that doesn't match anything?
Mismatched or dated hardware is one of those things people don't consciously notice: until you fix it. Then suddenly, your kitchen or bathroom looks intentional.
You can grab a multipack of modern cabinet pulls or knobs for around $30 to $50, and the swap takes less than an hour. Go for a finish that matches your faucets and light fixtures, and you'll be shocked at how much more cohesive everything feels.
Pro tip from Your Handyman Pros: If you're doing a bunch of cabinets (like a full kitchen), a power drill with a bit set makes this job way faster. And if your old hardware left different-sized holes, we can patch and re-drill those to make everything line up perfectly. It's one of those small details that shows you care.
2. The "Silence the Squeak" & Loose Handle Tour
This one's so simple it feels almost silly to mention: but it's the fix that makes your house feel like it's been maintained instead of just lived in.
Grab a screwdriver and walk through your house. Tighten every loose door handle, cabinet hinge, towel bar, and drawer pull you can find. Hit squeaky door hinges with a little WD-40 or 3-in-One oil. If a door is dragging on the floor, tighten the top hinge screws (loose screws let the door sag).
This costs you basically nothing, and it makes a massive difference. No more rattling bathroom doors. No more cabinet handles that wiggle when you grab them. Just smooth, quiet operation like your house is brand new.
We see this all the time in homes across West Valley City, Magna, and Bountiful: little things that have been loose for years, and homeowners just got used to it. But guests notice. And if you're ever thinking about selling? Buyers definitely notice.
3. Fresh Caulking: The Instant "Clean" Upgrade
Old, cracked, or moldy caulk in your bathroom or kitchen is one of those things that screams "this place needs some TLC." But here's the thing: re-caulking is stupid easy and costs less than $10 in materials.
Pick up a tube of mold-resistant silicone caulk (go with white or clear for most bathrooms), a caulk gun, and a caulk removal tool. Scrape out the old stuff, clean the surface with rubbing alcohol, and lay down a fresh bead. Smooth it with a wet finger or a caulk tool, and you're done.
Fresh caulk around your tub, shower, or kitchen sink makes everything look new. It's like giving your bathroom a mini facelift for the cost of lunch.
Why this matters: Water intrusion from failed caulk can lead to much bigger (and more expensive) problems down the road. A $10 fix now beats a $2,000 mold remediation job later. And as a licensed contractor (Lic #12888335-5501), I've seen what happens when small stuff gets ignored.
4. Smart Lighting Upgrades: Set the Mood (And Save Money)
Walk through your house and look at your light bulbs. Are they all different colors? Do you have some warm white, some daylight, and a couple of those yellowish bulbs from 2003 that make your bathroom look like a gas station?
Upgrading to consistent LED bulbs throughout your house costs around $30–$50 and makes a huge visual difference. Pick one color temperature (I like 2700K–3000K for a warm, welcoming vibe) and swap them all out.
Want to level it up? Install a smart dimmer switch in your living room or bedroom for another $25–$40. Now you can control the mood with your phone or voice, and you'll actually use your overhead lights because they're not stuck at blinding full brightness.
This is one of those upgrades that sounds fancy but takes about 15 minutes if you know what you're doing. And if you're not comfortable messing with electrical? That's exactly why Your Handyman Pros exists. We're a B100 General Contractor, so even the small electrical stuff is done safely and up to code.
5. High-Pressure Showerheads: The Luxury You Deserve
If your shower feels like a sad trickle instead of a spa experience, you're probably dealing with an old, low-flow showerhead that's seen better days.
Swapping it out for a modern, high-pressure showerhead costs $30–$50 and takes about 10 minutes. No special tools. Just unscrew the old one, wrap some Teflon tape around the threads, and screw on the new one.
The difference? Night and day. Suddenly, your morning shower feels like a vacation. And if you go with a water-efficient model (look for the WaterSense label), you'll actually save money on your water bill.
This is one of those fixes that makes you wonder why you waited so long. And if you're doing a bunch of other small upgrades at the same time, we can knock it out along with everything else in one visit.
Why Small Fixes Add Up to a Big Deal
Here's the thing: none of these fixes are individually life-changing. But when you knock out five or six of them in one afternoon? Your house goes from "we've been meaning to fix that" to "we've got this place dialed in."
And that feeling matters. It's the difference between coming home and noticing all the little annoyances versus coming home and actually enjoying your space.
Plus, if you're thinking about selling in the next few years, these small details signal to buyers that the house has been taken care of. They might not consciously notice that all your hardware matches or that the caulk is perfect: but they'll feel it. And that feeling translates into offers.
The Your Handyman Pros Advantage: Bundle It All in One Visit
Look, I get it. You're busy. Between work, kids, and everything else, finding time to hunt down the right cabinet pulls and spend a Saturday tightening hinges just isn't happening.
That's where we come in.
At Your Handyman Pros, we love these kinds of projects. Give us a list of all the little stuff that's been bugging you: the squeaky doors, the mismatched hardware, the shower that needs upgrading, the caulk that's seen better days: and we'll knock it all out in one visit.
We work throughout Salt Lake County, Davis County, Wasatch County, Summit County, and Tooele County, and we treat every job (big or small) with the same level of care. Because we're a licensed general contractor (Lic #12888335-5501), you know that even simple stuff like installing a dimmer switch is done right.
And honestly? There's something satisfying about finally checking off that whole list of "someday" projects in one go.
Ready to Make Your Home Feel Maintained?
If you've got a running list of small fixes that keep getting pushed to next weekend, let's tackle them together. Whether it's in Herriman, Riverton, Sandy, or anywhere across the Salt Lake Valley, we're here to help you love your home again: without breaking the bank.
Want to see more ideas for upgrading your space without a full remodel? Check out our guide on making a room feel new without remodeling or dive into window trim upgrades that change a whole room.
Give us a call or visit yourhandymanpros.com to schedule your "nuisance fix" visit. Let's knock out that list together.

Window Trim Upgrades That Change a Whole Room
Window Trim Upgrades That Change a Whole Room
Ever walk into a room and think, "Something feels off, but I can't put my finger on it"?
Nine times out of ten, it's the trim.
Window trim is like the picture frame for your home's views: and most houses across Sandy, Herriman, and the Salt Lake Valley are walking around with dollar-store frames on million-dollar paintings. That's not an exaggeration. Builder-grade window casing is the cheapest, fastest thing contractors slap on during construction, and it shows.
The good news? Upgrading your window trim is one of the easiest, highest-impact changes you can make to a room without breaking the bank or living in renovation chaos for weeks. Let's talk about why it matters, what your options are, and how to do it right.
The Problem with Builder-Grade Window Trim
Walk through any subdivision built in the last 20 years in Riverton or West Valley City, and you'll see the same thing: skinny, flat, uninspired 2.25" window casing. Sometimes it's not even painted properly. Sometimes there's no trim at all: just drywall bumped up against the window frame with a bead of caulk trying to hold it all together.
Here's why that's a problem:
It looks cheap. Because it is. Thin trim screams "we built this fast," and buyers, appraisers, and your own eyeballs can tell.
It makes windows look smaller. Without substantial framing, your windows get lost in the wall. They don't stand out as architectural features: they just kind of... exist.
It doesn't match anything. If you've already upgraded to taller baseboards (5.5" or more), your skinny window trim looks like it belongs in a different house.
The fix? Go bigger, go bolder, and give your windows the presence they deserve.
Size Matters: Upgrading to 3.5" or 5" Casing
The easiest visual upgrade is simply going wider. Swapping out 2.25" trim for 3.5" or even 5" casing adds instant architectural weight to a room. It's like going from wire-frame glasses to statement frames: you're still looking at the same view, but now it has presence.
3.5" trim is the sweet spot for most homes. It's substantial without feeling heavy, works in both modern and traditional spaces, and pairs beautifully with matching baseboard profiles. This is what we recommend for most projects in Magna and Sandy.
5" trim is for when you really want to make a statement. Think formal living rooms, dining rooms, or homes with high ceilings (9 feet or more). It's bold, it's classic, and it says "we didn't cut corners here."
Pro tip: If you're upgrading window trim, this is also the perfect time to add a window sill or "stool" if you don't have one. A properly installed stool gives your windows a finished, custom look that builder-grade shortcuts skip entirely.
Craftsman vs. Modern: Picking Your Style
Not all trim is created equal. The profile (the shape of the molding) you choose will completely change the vibe of your room.
Craftsman Style
Craftsman trim is all about clean lines, right angles, and simplicity. It's the go-to for farmhouse and transitional homes across the Salt Lake Valley. The profile is usually flat or slightly stepped, with minimal decorative detail. It's handsome, timeless, and doesn't compete with your furniture or decor.
Best for: Homes built after 1990, modern farmhouse aesthetics, open floor plans, and spaces where you want the focus on function and simplicity.
Traditional/Ornate Style
If your home has more classical bones: think crown molding, wainscoting, or built-in bookcases: you'll want window trim with more personality. Profiles with curves, beading, or paneled details add texture and gravitas. This is the move for older homes in Herriman or anywhere you're leaning into a more formal, "estate home" aesthetic.
Best for: Homes built before 1980, formal living and dining rooms, or anywhere you want that "old money" elegance.
Modern Minimalist
For ultra-contemporary homes, less really is more. Modern window trim is often flush with the wall or even trimless, letting the window itself be the star. If you're going this route, the execution has to be flawless: drywall returns need to be crisp, paint lines need to be laser-straight, and there's zero room for sloppy craftsmanship.
Best for: New builds, loft-style spaces, or anywhere you're showcasing bold wallpaper or accent walls.
The Matching Game: Tying Trim Together
Here's where most DIY projects fall apart: your window trim needs to match your baseboards. Not just in color, but in width and profile.
If you've already upgraded to 5.5" baseboards, but your window trim is still that sad little 2.25" builder special, your room looks like two different contractors worked on it (and didn't talk to each other). The mismatch is subtle, but your brain picks up on it immediately.
The fix is simple: match the width and style. If you're running Craftsman-style baseboards, run Craftsman-style window casing. If your baseboards are 5.25", your window trim should be in the same ballpark (3.5" minimum, 5" if you want it to match exactly).
This creates visual cohesion. Your eyes can move around the room without tripping over mismatched details. It's the difference between a room that feels "together" and one that feels like it's still under construction.
Color Drenching: The 2026 Trend You Need to Know
If you've been scrolling through design accounts lately, you've probably seen this: walls, trim, and ceiling all painted the same color. It's called color drenching, and it's having a huge moment in 2026.
Instead of the classic white trim + colored walls combo, designers are painting everything: including window trim: in one cohesive hue. The result? A seamless, wrapped-in-color aesthetic that feels modern, cozy, and way more expensive than it actually is.
Why it works: Removing the contrast between wall and trim makes the room feel larger and more unified. It's especially effective in smaller spaces like bedrooms or home offices.
How to do it: Pick a color you love (deep greens, warm terracottas, and moody blues are trending hard right now), and commit. Paint the walls, the window trim, the baseboards, even the ceiling if you're feeling bold. Use the same sheen throughout for a truly cohesive look.
Fair warning: this trend requires perfect execution. Any gaps, uneven paint lines, or sloppy cuts will stand out because there's no contrasting color to hide behind. That's where having a licensed pro with finish carpentry experience (like the team at Your Handyman Pros) makes all the difference.
High Impact, Lower Cost Than You Think
Here's the best part about window trim upgrades: the ROI is way higher than most homeowners expect.
A full kitchen remodel in West Valley City can run $40,000–$80,000. New flooring throughout a 2,000-square-foot home? $8,000–$15,000. But upgrading the window trim in your main living areas? We're talking a few thousand dollars for a transformation that affects how the entire room feels.
It's one of those rare upgrades where the visual impact far exceeds the dollar amount. Buyers notice. Appraisers notice. And more importantly, you'll notice every single day.
Why Precision Cuts Matter (Hint: Those Miter Joints)
Here's where we have to talk about the elephant in the room: bad trim work is worse than no trim at all.
If the miter joints (those 45-degree corner cuts where two pieces of trim meet) don't line up perfectly, your eye goes straight to them. Gaps, uneven reveals, paint that doesn't quite cover the seams: it all screams "DIY project gone wrong."
This is finish carpentry, and it's a completely different skill set than framing or drywall. At Your Handyman Pros, Michael and Kristy's team handles trim upgrades with B100 GC-level precision. We're talking:
Laser-accurate miter cuts with zero gaps
Proper nail placement so there are no visible holes or splits
Caulking and paint prep that creates seamless transitions
Matching profiles across every window in the space
We've been doing this across Salt Lake County, Davis, Wasatch, Summit, and Tooele counties long enough to know: the details matter. A quarter-inch gap in a corner joint might seem small, but it'll bother you every time you walk past that window. We make sure it's done right the first time.
Ready to Frame Your View the Right Way?
If you're tired of looking at builder-grade trim that makes your windows look like afterthoughts, it's time for an upgrade. Whether you're going full Craftsman in Sandy, embracing color drenching in Herriman, or creating a sleek modern look in Riverton, new window trim is one of the fastest ways to make a room feel like it belongs in a magazine instead of a rental.
And here's the thing: this isn't a months-long project. Depending on the size of your space, we can often complete window trim upgrades in a matter of days: not weeks.
Want to see what's possible in your home? Reach out to Your Handyman Pros and let's talk about giving your windows the frame they deserve. Licensed (Lic #12888335-5501), insured, and obsessed with clean miter joints: that's how we roll.

How to Make One Room Feel Brand New Without a Full Remodel (The 2026 Refresh Guide)
How to Make One Room Feel Brand New Without a Full Remodel (The 2026 Refresh Guide)
Look, we get it. You walk into your living room or bedroom every day and think, "This space needs something." But the idea of tearing out drywall, living in construction dust for weeks, and dropping $20K on a full remodel? Yeah, that's not happening right now.
Here's the good news: in 2026, the biggest design trend isn't about gutting rooms, it's about making smart, high-impact updates that completely transform how a space feels without the chaos of a full renovation. We're talking paint, lighting, and trim work that can make a room look like it belongs in a different house.
And if you're in Sandy, Herriman, Riverton, or anywhere across the Salt Lake Valley, you're in luck. Because these updates work especially well in our Utah homes, where builder-grade everything is practically a standard feature.
Let's break down the three upgrades that'll give you the biggest bang for your buck, and why having a licensed contractor (like us at Your Handyman Pros, Lic #12888335-5501) handle the details makes all the difference.
1. Color Drenching: The Paint Trend That's Everywhere in 2026
Remember when every wall in every Utah home was "Swiss Coffee" or "Agreeable Gray"? Yeah, 2026 is saying goodbye to all that.
The hottest paint trend right now is called color drenching, and it's exactly what it sounds like. You pick one rich, warm color and paint everything in that room the same hue: walls, trim, ceiling, even the doors. The result? A cozy, enveloping space that feels intentional, modern, and about a million times more expensive than it actually was.
Why It Works in Salt Lake Valley Homes
Most homes in Herriman and Sandy came with stark white walls and that awful popcorn ceiling texture. Color drenching hides imperfections (hello, textured ceilings) and makes rooms feel cohesive instead of like a bland box.
Popular 2026 colors for drenching:
Earthy greens (think sage, not lime)
Warm taupes and terracottas
Deep navy or charcoal (for dramatic spaces like home offices or master bedrooms)
Soft blush or clay tones (for bedrooms and nurseries)
The key is picking a color with enough depth that it doesn't feel flat, but not so dark that it closes in the room. And here's a pro tip: if you're painting everything one color, quality matters. Cheap paint will show roller marks and uneven coverage, especially on trim and ceilings.
We see this all the time in Riverton and Bountiful: homeowners DIY with box-store paint, and six months later, it looks patchy and sad. A good contractor knows which paints have the right sheen and coverage for trim versus walls, and we prep surfaces correctly so the finish is flawless.
2. Layered Lighting: Ditch the Builder-Grade Boob Light
You know that flush-mount ceiling fixture that came with your house? The one that looks like a sad, flat pancake stuck to the ceiling? Yeah, it's gotta go.
Layered lighting is the design secret that makes expensive homes feel, well, expensive. Instead of relying on one overhead light to do all the work, you create "layers" of light at different heights and purposes:
Ambient lighting (your main overhead fixture, but upgraded)
Task lighting (sconces, under-cabinet lights, reading lamps)
Accent lighting (picture lights, LED strips, dimmers)
Why This Upgrade Matters
Lighting changes how your brain perceives a room. A single harsh overhead light flattens everything and makes spaces feel cold and institutional. But when you add a statement chandelier, a pair of bedside sconces, and dimmable recessed lights? Suddenly the same room feels warm, functional, and like something out of a design magazine.
The 2026 trend is moving away from those trendy Edison bulbs (sorry, 2018) and toward warm, dimmable LEDs with smart controls. Imagine walking into your living room in Sandy and saying, "Hey Google, dim the lights to 40%," and actually having it happen. That's not futuristic anymore, it's standard.
The Catch: You Need a Licensed Electrician
Here's where a lot of DIYers get stuck. Swapping out a light fixture sounds easy until you open up that ceiling box and find outdated wiring, no ground wire, or a junction box that's not rated for the weight of your new chandelier.
At Your Handyman Pros, we're B100 licensed general contractors. That means when we install your new lighting, we're pulling permits, running new circuits if needed, and making sure everything is up to code. Because the last thing you want is a beautiful new fixture that's a fire hazard.
We handle this stuff every week across the Salt Lake Valley, from rewiring old homes in Bountiful to installing recessed lighting in new builds in Herriman. And yeah, it costs more than a YouTube tutorial, but your homeowner's insurance will thank you.
3. Trim & Molding: The Secret Weapon of High-End Homes
Walk into any expensive home in Sandy or Draper, and you'll notice something: the trim looks substantial. It's not those skinny 2-inch baseboards that come standard in most Utah tract homes. It's wide, clean, and detailed.
Upgrading your trim and adding simple molding is one of the most underrated ways to make a room feel finished and high-end, without tearing anything down.
What We're Talking About
Wider baseboards (5–7 inches instead of the standard 3)
Crown molding (yes, it's back: but in a simpler, modern profile)
Board-and-batten or picture frame molding on accent walls
Upgraded door casings with corner blocks or rosettes
These aren't massive renovations. We're not moving walls or replumbing. But the visual impact? Huge.
Why Precision Matters
Here's the thing about trim work: it's all about the details. Gaps, uneven joints, and visible nail holes scream "DIY gone wrong." Professional carpenters know how to cope inside corners, scribe baseboards to uneven floors, and get those miter cuts perfectly flush.
We've redone trim in hundreds of homes across Riverton, West Valley City, and the entire Salt Lake Valley. And every time, the homeowner says the same thing: "I didn't realize how much of a difference this would make."
It's because trim is like the frame on a painting. When it's done right, it makes everything else in the room look better.
Why Hire Your Handyman Pros for a Room Refresh?
Look, we're not saying you can't paint a room yourself or swap out a light fixture. But here's why homeowners across the Salt Lake Valley call us for these "simple" updates:
1. We're licensed and insured (B100, Lic #12888335-5501)
That means permits, code compliance, and actual liability coverage if something goes wrong. DIY tutorials don't come with that.
2. We handle the "boring" prep work
Taping, priming, sanding, patching: this is 70% of a good paint job, and it's the part most people skip. We don't.
3. We have the right tools
From laser levels for trim installation to commercial-grade paint sprayers, we do this every day. You'd spend more renting tools than just hiring us.
4. We're fast
What takes you three weekends takes us three days: and you don't have to move all your furniture twice.
Whether you're in Sandy, Herriman, Magna, or anywhere in the Salt Lake Valley, we've seen every quirk these homes throw at us. And we know how to make them look great without breaking the bank.
The Bottom Line: Small Updates, Big Impact
You don't need a full remodel to fall back in love with your home. Sometimes all it takes is the right paint color, better lighting, and trim that actually looks finished.
These updates give you that "new room" feeling without the dust, cost, or months of construction. And in 2026, that's exactly what smart homeowners across Utah are choosing.
Ready to refresh a room in your home? Let's talk about what's possible. At Your Handyman Pros, we do everything from the initial design consult to the final coat of paint: and we're licensed, insured, and local to the Salt Lake Valley.
Give us a call or visit yourhandymanpros.com to schedule your free estimate.
Because life's too short to stare at builder-grade everything.

The Winter Home Inspection Checklist (Interior Edition): Catch Small Issues Before They Become Big Utah Spring Repairs
The Winter Home Inspection Checklist (Interior Edition): Catch Small Issues Before They Become Big Utah Spring Repairs
Listen, I get it. When it's 28 degrees outside and there's still snow on the ground in Sandy or Herriman, the last thing you want to think about is climbing into your attic or crawling under sinks. But here's the thing: February is actually the perfect time for an interior home inspection.
Why? Because you're stuck inside anyway, your house has been "stress-tested" by Utah's dry winter air and cold snaps, and you've got a couple months before the spring thaw turns small problems into big, expensive headaches.
I'm Michael, co-owner of Your Handyman Pros with my wife Kristy, and we're B100 licensed general contractors (Lic #12888335-5501) here in the Salt Lake Valley. We've seen what happens when homeowners skip the mid-winter check-in. Spoiler alert: it usually involves emergency calls in April when that "tiny gap" in the baseboard turns into a full-blown drywall project.
So grab a flashlight, maybe a cup of coffee, and let's walk through the five critical areas you should be checking right now, before spring cleaning season kicks into high gear.
1. Trim & Baseboards: The Telltale Signs of Utah's Bone-Dry Winter Air
Utah winters aren't just cold, they're dry. Like, Sahara Desert dry. And your trim and baseboards? They feel it.
What to Look For:
Gaps between baseboards and walls where they used to sit flush
Separation at corner joints, especially in 45-degree miters
Nail pops where the trim has pulled away from the wall studs
Paint cracking along seams (this often means the wood itself has shrunk)
Walk around every room with intention. Run your hand along the top edge of your baseboards. If you feel gaps or see visible cracks, that's your house telling you it's been dealing with humidity swings all winter.
The Fix: Most of these are quick repairs, recaulking, filling nail holes, maybe re-securing a loose piece. But if you're seeing widespread separation, especially in newer builds in Riverton or Herriman, it could point to a bigger issue with your HVAC humidity levels or improper installation. That's where having a licensed GC (like us) take a look can save you from band-aiding something that needs a real solution.
2. Doors & Hardware: When "Sticky" Becomes "Stuck"
Doors are honest. They don't hide problems, they just stop working properly.
What to Check:
Doors that drag or won't latch (especially on second floors or in basements)
Sticky locks or deadbolts that take muscle to turn
Drafts around door frames, use your hand or a lighter flame to detect airflow
Sagging hinges where the door hangs lower on one side
Interior doors that suddenly don't close right in February? That's often foundation settling or seasonal wood movement. It's normal to a point, but if your bedroom door went from "fine" to "I have to shoulder-check it to close" in one winter, we should talk.
Pro Tip for Exterior Doors: Stand inside near your front door on a windy day. Feel a breeze? Your weatherstripping is shot. A $15 fix now beats a $300 heating bill later. And if your deadbolt is getting harder to turn, don't just spray WD-40 and call it good, check the strike plate alignment. Misaligned hardware wears out fast and can become a security issue.
3. Plumbing Check: The Silent Leak Under Your Sink
This one's sneaky. You won't always see water damage until it's too late.
Your February Plumbing Checklist:
Check under every sink (kitchen, bathrooms, laundry room) for moisture, water stains, or that musty smell
Test your shut-off valves, turn them clockwise until they stop, then back open. If they're frozen or won't budge, they need replacing before you have an emergency.
Look for slow drips on exposed pipes in basements or crawl spaces
Run all your faucets and listen for weird sounds, gurgling, banging, or hissing can point to pressure issues or air in the lines
Here's a reality check from years in the field: most shut-off valves in Utah homes over 15 years old have never been touched. Homeowners assume they work until the day they need them, and then, nothing. The valve breaks off, water sprays everywhere, and suddenly it's a way bigger job.
Why This Matters in February: We've had some serious cold snaps this winter. If you had any freeze events, even brief ones, you might have micro-cracks in pipes that won't show up until spring when you start using more water. Catching a slow drip now = $50 repair. Catching it in May when your drywall is sagging = $2,000+ project.
4. Attic & Ceiling: Where Ice Dams and Insulation Gaps Show Their Work
Your attic is the canary in the coal mine for your home's energy efficiency and weather protection.
What You're Looking For:
Water stains on ceiling drywall (especially near exterior walls or in bathrooms)
"Hot spots" in the attic, areas where insulation has compressed, fallen, or is just plain missing
Frost or ice buildup on the underside of your roof sheathing (yes, inside the attic)
Daylight peeking through roof vents or eaves
If you've had icicles hanging off your gutters this winter, especially big, dramatic ones, that's a sign of heat escaping through your roof. Warm air melts snow from underneath, it runs to the cold eaves, refreezes, and boom: ice dam. Left unchecked, those dams back water up under your shingles and into your home.
The Bountiful/Sandy Connection: Homes in older neighborhoods often have attic insulation that's settled or degraded over decades. Modern code calls for R-38 to R-49 in Utah attics. If you're sitting at R-19 because your insulation is from 1982, you're losing money every single day, and probably dealing with uneven heating throughout your house.
Our Take as GCs: Attic work isn't glamorous, but it's one of the highest ROI fixes you can make. We handle the full scope, air sealing, insulation upgrades, ventilation fixes, and because we're licensed B100 contractors, we can pull permits if needed and tie it into any structural repairs. A handyman might blow in some insulation. We make sure your entire system works together.
5. Closet Systems: Before the Spring Cleaning Frenzy Hits
Okay, this one might seem minor compared to plumbing leaks and attic insulation, but hear me out.
Check Your Closets For:
Sagging shelves (especially wire shelving loaded with storage bins)
Loose or missing shelf brackets
Bowing closet rods that can't handle your winter coat collection
Doors that don't slide or close properly
Spring cleaning is coming. You know it is. And the last thing you want is to be halfway through your "donate pile" when your closet rod gives up and dumps 47 hangers onto your shoes.
The Upgrade Opportunity: If you're finding that your builder-grade wire shelves are barely hanging on, February is the perfect time to upgrade to a custom closet system. Wood shelving, better support, maybe even double-hang rods for maximum storage. It's a project that takes a day or two, makes zero mess, and instantly makes your home feel more organized. Plus, if you're thinking about selling in the next few years? Upgraded closets photograph really well and show buyers you've maintained the home.
Why the "Your Handyman Pros" Advantage Matters Here
Here's the thing about home inspections: they're only useful if you actually do something with the information.
A lot of homeowners go through this checklist, find issues, and then... nothing. Because they don't know who to call, they're worried about cost, or they think they can DIY it (spoiler: some things you definitely can, some you absolutely shouldn't).
That's where Kristy and I come in. We're not just handymen, we're B100 General Contractors licensed with the state of Utah (Lic #12888335-5501). That means if your "small plumbing leak" turns out to be a bigger issue, or if that attic inspection reveals you need structural work, we can handle the entire project.
No passing you off to another company. No coordination headaches. Just one call, one team, and a solution that's done right the first time.
We've been serving Herriman, Sandy, Riverton, Bountiful, and the entire Salt Lake Valley for years, and we've built our reputation on being the contractors who show up, communicate clearly, and treat your home like it's our own.
Your February Action Plan
Don't let this checklist overwhelm you. Pick one area this weekend. Spend 20 minutes walking through your baseboards. Next weekend, check the attic. The goal isn't perfection, it's awareness.
And if you find something that makes you think, "Hmm, that doesn't look right," snap a photo and give us a call. We offer free estimates, and honestly, sometimes a five-minute conversation can tell you whether it's a $50 DIY fix or something that needs a professional.
Ready to get your home checked before spring hits? Visit us at www.yourhandymanpros.com or give us a call. Let's make sure your home is ready for whatever 2026 throws at it: because in Utah, "whatever" usually involves surprise snow in April and sprinkler blowouts you forgot to schedule.
Stay warm out there, Salt Lake Valley. And remember: small fixes now = big savings later.

Closet Makeovers That Add Real Value: Why Utah Homeowners are Ditching Wire Shelves in 2026
Closet Makeovers That Add Real Value: Why Utah Homeowners are Ditching Wire Shelves in 2026
Let me guess: you open your closet door and see those sagging wire shelves that came with the house. Your clothes are crushed together, sweaters are falling through the gaps, and that one shelf in the corner has been permanently bent since 2019.
Here's the thing, those wire shelves weren't meant to last. They were builder-grade shortcuts, and in 2026, Utah homeowners across Sandy, Herriman, Riverton, and Bountiful are finally saying "enough."
But here's what most people don't realize: upgrading your closet isn't just about getting organized. It's one of the highest-ROI home improvements you can make. A well-designed closet can deliver up to 50% return on investment and, even better, it makes your house sell faster when the time comes.
Let's talk about why closets matter more than you think, what's trending right now in the Salt Lake Valley, and how a licensed B100 General Contractor (like us) approaches a closet makeover way differently than a "shelves-only" company.
Why Closets Are a Big Deal in 2026
Closets used to be afterthoughts. Builders slapped in wire shelving, called it done, and moved on. But buyers today? They're looking at closets. They're opening doors during showings, checking for custom systems, measuring hanging space, and judging how "finished" the home feels.
A boring closet with wire shelves screams "builder-grade." A custom closet with wood finishes, pull-out drawers, integrated lighting, and thoughtful layout? That says someone took care of this home.
And it's not just about selling. If you're staying put, a good closet makes daily life easier. Less time hunting for shoes, less chaos in the morning, and less stress when guests are coming over and you need to hide the mess fast.
The Problem with Wire Shelving (And Why Everyone's Over It)
Wire shelves were cheap, fast to install, and just functional enough to pass inspection. But after a few years of real life? Here's what happens:
They sag. Especially in the middle. Load them with jeans and sweaters, and you're looking at a permanent curve.
Clothes fall through the gaps. Folded shirts tip over, hangers slide to one side, and smaller items just… disappear.
They snag delicate fabrics. If you've ever pulled a sweater off a wire shelf and heard that little rip, you know.
They look cheap. Even if the rest of your home is updated, wire shelves give the game away.
They're hard to adjust. Most wire systems are fixed-height. If your storage needs change (hello, baby clothes or sports gear), you're out of luck.
Bottom line: wire shelving does the bare minimum. And in 2026, Utah homeowners want more.
What "Custom Closet" Actually Means (And Why It's Worth It)
When we say "custom closet," we're not talking about slapping up a few extra shelves. We're talking about a tailored storage system designed around how you actually use the space.
Here's what that looks like:
1. Modular Systems That Adapt
Modular closet systems (think Elfa-style or custom wood configurations) let you move shelves, add baskets, swap rods, and reconfigure without tearing anything out. This is huge for growing families, people who work from home (and need a place for office overflow), or anyone whose storage needs shift over time.
2. Pull-Out Drawers and Slide-Out Shelves
Instead of stacking sweaters in a tower and praying they don't collapse, pull-out drawers keep everything visible and accessible. Same goes for slide-out shelves for shoes, bins, or folded items. It's the difference between "organized chaos" and "I know exactly where that is."
3. Double-Hang Rods and Vertical Maximization
Most closets waste the upper third of the space. Adding a second hanging rod below the first one instantly doubles your hanging capacity, perfect for shirts, blouses, and pants. In homes around West Valley City and Magna with smaller closets, this is a game-changer.
4. Custom Built-Ins and Wall-to-Wall Cabinetry
If you really want the high-end look, built-in cabinetry turns a closet into a room. Drawers for jewelry, pull-out racks for ties or scarves, dedicated shoe cubbies, and hampers built right into the design. This is where a closet stops being "storage" and starts being part of the home's architecture.
5. Integrated Lighting (Motion Sensor LEDs)
Here's where having a licensed B100 General Contractor with electricians on staff matters. We're not just hanging shelves, we're wiring LED strips, motion sensors, and under-shelf lighting so you can actually see what you're looking for. This is especially valuable in walk-in closets or deep reach-ins where natural light doesn't reach.
A closet with good lighting feels bigger, cleaner, and more expensive. Period.
2026 Closet Trends in the Salt Lake Valley
Every year, closet design shifts a little. Here's what we're seeing right now in Sandy, Herriman, and Riverton:
Warm Wood Finishes (Oak, Walnut, Natural Tones)
The all-white closet trend is fading. Homeowners want warmth, natural oak, walnut stains, and honey-toned wood that feels rich but not over-the-top. These finishes pair beautifully with modern homes and give closets a boutique vibe.
Textured Materials (Linen, Leather Accents, Matte Hardware)
Luxury is in the details. Linen-lined drawers, leather pulls, and matte black or brushed gold hardware add sophistication without looking "too much." This is the kind of upgrade that makes buyers pause and say, "Wow, they really thought about this."
Lifestyle Closets (Dressing Zones, Flex Storage)
Some homeowners are converting spare bedrooms or unused corners into full dressing rooms: complete with seating, mirrors, and dedicated zones for getting ready. Others are adding flexible storage sections that can hold luggage, seasonal gear, or hobby supplies. The idea is that closets aren't just for clothes anymore.
Smart Tech Integration
Motion-sensor lights, automated closet rods that lower for accessibility, and even app-controlled LED colors are becoming more common. It's not about being fancy: it's about making life easier.
Why You Want a Licensed B100 GC (Not Just a Closet Company)
Here's where we're different from the big-box closet companies or DIY kits.
We're licensed and insured (Utah License #12888335-5501), which means we can handle the whole project: not just the shelving.
That includes:
Drywall repair and prep. Most closets have holes, uneven surfaces, or old paint that needs addressing before new systems go in. We patch, smooth, and prep the walls so the final install looks seamless.
Electrical work. If you want lighting (and you should), we bring in our electricians to wire it correctly: no extension cords, no fire hazards, just clean, code-compliant work.
Structural support. Heavy cabinetry and full-wall systems need proper anchoring, especially in older homes where studs might not be where you expect. We find the structure, reinforce if needed, and make sure everything's secure.
Coordination with other trades. Need paint after the install? Flooring? We coordinate it all so you're not juggling three different companies.
When you hire a closet-only company, they show up, hang their system, and leave. When you hire Your Handyman Pros, you get a full finish carpentry and remodeling team that treats your closet like the high-value upgrade it is.
Real ROI: What a Closet Upgrade Adds to Your Home
Let's talk numbers. According to recent data, a well-executed closet remodel can return 40–50% of the cost at resale. But the real value isn't just dollars: it's time on market.
Homes with upgraded closets (especially walk-ins with custom systems) sell faster. Buyers see them as move-in ready, and they're willing to pay a little more for homes that don't need immediate work.
Even if you're not selling, the daily convenience is worth it. Faster mornings, less clutter stress, and a home that feels more "together."
We Serve the Entire Salt Lake Valley (And Beyond)
We're based here, and we work all over Sandy, Herriman, Riverton, West Valley City, Magna, and Bountiful. Whether it's a single reach-in closet in a condo or a full primary suite walk-in, we've done it.
Closet projects can usually be completed in 1–3 days depending on scope, and we always leave the space clean, paint-ready, and fully functional.
Bottom Line: Your Closet Deserves Better Than Wire Shelves
If you've been living with sagging, outdated wire shelving, 2026 is the year to upgrade. Custom closets aren't just trendy: they're smart investments that make your home work better and feel more valuable.
And when you work with a licensed B100 General Contractor like Your Handyman Pros, you're not just getting shelves. You're getting drywall prep, lighting, structural support, and a finish that looks like it was always meant to be there.
Want to talk options? Call or text 801-949-2376, or visit us at yourhandymanpros.com. We'll measure your space, show you material and finish options, and give you a clear estimate: no pressure, no upselling, just honest advice from people who've been doing this work in the Salt Lake Valley for years.
Because your closet shouldn't just hold your stuff. It should make your life easier.

The Entryway Glow-Up: Why Board & Batten is the Ultimate First Impression for Utah Homes
The Entryway Glow-Up: Why Board & Batten is the Ultimate First Impression for Utah Homes
Your entryway is the handshake of your home. It's the first thing you see when you walk in after a long day, the first thing guests notice, and, let's be honest, it's probably also the dumping ground for coats, boots, backpacks, and whatever else didn't make it to its actual home.
If your entryway or mudroom feels like a plain, boring hallway that's been beaten up by Utah winters, board and batten might be the glow-up you didn't know you needed.
And February? It's the perfect time to knock this project out. It's 100% indoors, there are no weather excuses, and you'll have it done before spring mud season turns your entry into a disaster zone again.
What is Board and Batten (and Why Does It Look So Good)?
Board and batten is a classic wall treatment where vertical boards (the "battens") are installed over a flat surface, creating raised panels or stripes. It originated as an exterior siding style, but it's become one of the hottest interior design trends, especially in entryways, mudrooms, hallways, and dining rooms.
Why does it work so well?
It adds dimension. Plain drywall is flat and forgettable. Board and batten creates depth, shadows, and visual interest that make a space feel intentional and designed.
It's durable. This isn't just pretty, it's practical. The vertical boards take the beating from coats, bags, boots, and dog leashes. Your drywall doesn't. Board and batten adds a more durable, repairable surface than painted drywall, especially when built from solid wood or PVC and finished with quality enamel paint.
It looks expensive. Board and batten gives you that "custom millwork" vibe without the custom millwork price tag. It's one of those upgrades that makes people think you spent way more than you did.
It hides imperfections. Got a wall with dings, patches, or texture you hate? Board and batten covers it up and gives you a fresh start.
Why Your Entryway Needs This
Let's talk about what your entryway is really doing. It's not just a hallway, it's a drop zone, a launch pad, a coat closet, a shoe graveyard, and the place where you either feel calm or immediately stressed when you walk in the door.
If it's just blank drywall with scuffed paint and a lonely coat hook, it's not working hard enough.
Here's what board and batten brings to the table:
1. Protection from the chaos
Utah homes deal with snow boots, ski gear, muddy dogs, and the occasional river of slush dragged in from the driveway. Board and batten creates a protective wainscoting effect, the lower half of your wall (where all the action happens) becomes armored. Scuffs and dings hit wood, not drywall.
2. A "finished" look
Even if the rest of your home is mid-update, a board and batten entryway makes it look like you hired a designer. It's the kind of detail that says, "We care about how this house feels."
3. Adds functionality
You're not just installing trim, you're creating zones. Add hooks between the battens. Install a bench. Tuck in cubbies or shelves. Suddenly your entryway isn't just surviving, it's working.
4. Timeless style
Board and batten has been around for centuries, and it's not going anywhere. Whether your home is modern farmhouse, traditional, or somewhere in between, it fits. You're not chasing a trend, you're adding architecture.
Why February is Board and Batten Season
Let's be real: February in the Salt Lake Valley is not outdoor project weather. It's cold, it's slushy, and nobody wants to be outside doing landscaping or deck work.
But your entryway? That's indoors, climate-controlled, and ready to go.
Here's why February is prime time:
No weather excuses. Rain, snow, wind, none of it matters. This is finish carpentry, and it happens inside.
Get ahead of spring mud season. March and April turn Utah entryways into warzones. Wouldn't it be nice to have a durable, easy-to-clean space before that hits?
Homes feel stale in February. You've been staring at the same walls since Christmas. A quick entryway refresh can reset the vibe of your whole house.
Contractors have availability. Outdoor projects slow down in winter, which means you're more likely to get on the schedule fast.
If you're in Herriman, Riverton, Sandy, Bountiful, West Valley City, or Magna, this is the time to call.
Design Options: Classic, Modern, or Custom
One of the best things about board and batten is that it's incredibly flexible. You're not locked into one look.
Classic board and batten
Evenly spaced vertical boards from floor to chair rail height (usually 32–36 inches, but 1/3 of wall height can appear more proportional), with a horizontal cap rail on top. Paint it all one color (usually white or a soft neutral). This is the go-to for farmhouse or traditional homes.
Full-height board and batten
Take the battens all the way to the ceiling for a dramatic, modern look. This works especially well in entryways with 9- or 10-foot ceilings. It makes the space feel taller and more grand.
Picture frame style
Instead of vertical stripes, create large rectangular "frames" on the wall. This is a little more formal and works beautifully in dining rooms or formal entries.
Layered look
Combine board and batten on the lower half with a different treatment (like shiplap or a paint color) on the upper half. This is great if you want contrast or a two-tone effect.
Functional board and batten
Add hooks, cubbies, or a built-in bench as part of the design. This is a game-changer for mudrooms, you get the style and the function in one install.
You can keep it simple or go wild. Either way, it's going to look a thousand times better than blank drywall.
DIY vs. Pro: Where Board and Batten Gets Tricky
Board and batten looks like a straightforward DIY project. And if you've got a perfectly straight wall, no outlets, no baseboards to deal with, and a lot of patience… sure, you can probably pull it off.
But here's where it gets real:
Spacing and layout. Getting the battens evenly spaced and symmetrical is harder than it looks. One batten slightly off throws the whole wall.
Dealing with outlets and switches. You'll need to cut around them cleanly or extend them forward so they sit flush with the new trim. This is fiddly work.
Dealing with electrical boxes. Electrical boxes must remain flush with the finished wall surface. Adding trim often requires box extenders to keep outlets safe and code-compliant. If you're unsure, hire a pro.
Uneven walls. Utah homes: especially older ones: have wavy drywall and out-of-plumb corners. Battens will highlight every imperfection if you don't account for it. Walls and floors are rarely perfectly level, so layout should be based on visual balance, not just tape-measure math.
Finishing work. Caulking, filling nail holes, priming, and painting are what make board and batten look expensive. If the finish is sloppy, the whole project looks DIY.
This is where a licensed and insured B100 General Contractor makes all the difference.
At Your Handyman Pros (Lic #12888335-5501), we don't just "slap wood on walls." They handle the math, the layout, the precision cuts, the electrical adjustments, and the finish work that makes it look seamless. You get the custom millwork look without the stress, the weekends lost to YouTube tutorials, or the "close enough" corners.
Material Choices: MDF, Pine, or Something Else?
The material you choose affects the look, the durability, and the price.
MDF (Medium-Density Fiberboard): The most popular choice for painted board and batten. It's affordable, smooth, and takes paint beautifully. It doesn't expand/contract as much as real wood, so you get tighter seams. The downside? It doesn't hold up well to moisture, so skip it in mudrooms that see a lot of wet boots. Even in dry climates, entryways near exterior doors can experience moisture from snow and condensation. Seal all cut edges of MDF thoroughly with primer to reduce swelling risk.
Pine or poplar: Real wood gives you a slightly different look: more grain, more character. You can stain it or paint it. It's more durable than MDF, but it costs more and requires more prep work (sanding, priming).
PVC trim: If your entryway or mudroom is a high-moisture zone (think laundry room or back door that's constantly wet), PVC won't swell, warp, or rot. It's pricier, but it's bombproof. PVC expands and contracts more with temperature changes, so leave small expansion gaps and use the manufacturer’s adhesive recommendations.
We'll help you pick the right material for your space, your budget, and how much abuse your entryway takes.
Serving the Salt Lake Valley: Herriman, Riverton, Sandy, and Beyond
Whether you're in a newer build in Herriman or Riverton, an established neighborhood in Sandy or Bountiful, or an older home in West Valley City or Magna, board and batten works.
We've done entryways in split-levels where the front door opens right into the living room (awkward), ramblers with tiny mudrooms that needed to work harder, and two-stories with grand entries that just needed a little extra polish.
If you've been staring at your entryway thinking, "This could be so much better," you're probably right.
Ready to Upgrade Your Entryway?
February is the time. No weather excuses, no waiting for spring, and you'll have a finished, durable, high-end entryway before the madness of mud season hits.
We'll come out, measure your space, talk through design options, and give you a clear estimate. Licensed, insured, and ready to make your entryway the best part of your home.

Baseboards & Trim Upgrades: The Secret to a High-End Home (Without the High-End Price)
Baseboards & Trim Upgrades: The Secret to a High-End Home (Without the High-End Price)
February in the Salt Lake Valley is a weird month. Too cold for deck staining, too early for landscaping, and too unpredictable for exterior paint. But you know what thrives in February? Finish carpentry.
February is a good time to upgrade your baseboards. The weather doesn't matter. The ground can be frozen solid in Herriman or dumping snow in Sandy, doesn't make a lick of difference when you're indoors with a miter saw and a vision.
And here's the kicker: taller baseboards are one of the cheapest ways to make your home look expensive. We're talking a couple hundred bucks in materials and a weekend's work (or a call to us if you'd rather skip the learning curve). The ROI? Instant. The moment you step back and see those clean, tall lines running through your living room, your house just… feels different. More finished. More grown-up. More "I hired a designer" and less "I bought this house in 2003 and never touched the trim."
Let's break down why baseboards matter, what your options are, and how to pull this off without blowing your tax refund.
Why Baseboards Are the Unsung Heroes of Interior Design
Here's a secret that interior designers charge $200/hour to tell you: baseboards frame your walls the same way a good picture frame makes art look better.
Short, skinny baseboards (we're talking 2–3 inches) make your ceilings look lower and your rooms feel cheaper. They're builder-grade shortcuts from the early 2000s, and they scream "we finished this house on a tight budget."
Taller baseboards, 5, 6, even 7 inches, draw your eye upward, create visual weight, and make every room feel like someone actually designed it. You don't need crown molding or coffered ceilings or any of that HGTV fantasy stuff. Just taller baseboards. That's it.
Baseboard upgrades can give your home a noticeable change. Same paint. Same flooring. Just taller, cleaner trim. Homeowners always say the same thing: "Why didn't we do this years ago?"
The Magic Number: Go Taller
If your baseboards are currently 2–3 inches, upgrading to 5–6 inches is the sweet spot. It's noticeable without being over-the-top. If you've got 8-foot ceilings (standard in most Salt Lake Valley homes), 5.5-inch baseboards hit that Goldilocks zone, not too modern, not too traditional, just right.
If you've got 9- or 10-foot ceilings (lucky you), you can go taller, 7 inches or more. Anything shorter looks dinky in a high-ceilinged room.
Here's the thing: you don't have to rip out your old baseboards if they're in decent shape. You can layer new trim on top of them. Seriously. It's one of the best tricks in the book.
The layering method works great in many homes, but you need to check door casing height, floor vents, and outlet locations first. In some rooms, full removal and replacement is the better option. We have some solid tips and tricks if layering is right for your home, but you should always ask a professional if you have any doubts.
The Budget-Friendly Layering Trick
Let's say you've got standard 3-inch baseboards that are painted, caulked, and attached to the wall like they're never coming off. Prying them off means patching drywall, repainting, and generally making a mess. Instead, leave them alone and add a taller board on top.
Here's how it works:
Buy plain pine boards from the lumber section at Home Depot or Lowe's. A 1x6 (which is actually 5.5 inches tall) is perfect. These cost way less than pre-made decorative molding.
Cut and install the new boards right over your existing baseboards. Use a finish nailer or even construction adhesive if you're feeling adventurous.
Add a small trim piece (like 1.5-inch shoe molding or a simple cap) along the top edge for visual interest. This makes it look intentional and high-end.
Caulk, prime, and paint everything the same color. When it's done, it looks like one seamless piece of custom trim.
Total cost? Maybe $150–$250 in materials for an average-sized living room. Compare that to hiring a finish carpenter to rip out and replace everything (easily $1,000+), and you've just saved yourself a mortgage payment. You might see higher costs if you need plinth blocks, casing modifications, or full removal, but it'll still most likely be cheaper than total replacement by a finish carpenter.
If you're in Riverton or Magna and thinking, "Yeah, I could do that," you probably can. If you're thinking, "I don't own a miter saw and I'm not about to learn," give us a call.
Material Choices: MDF vs. Pine vs. Primed Boards
You've got options. Here's the breakdown:
MDF (Medium-Density Fiberboard): Smooth, cheap, easy to paint. Doesn't expand or contract with humidity changes like real wood does, which is great in Utah's dry climate. Downside? It's heavy and doesn't hold up well to dings in high-traffic areas. If you've got kids or big dogs, MDF might show wear faster than you'd like. Additionally, MDF swells badly if exposed to moisture, so avoid it in bathrooms, basements with humidity issues, or near exterior doors.
Pine: Classic, affordable, and paintable. A bit more forgiving than MDF if you accidentally whack it with a vacuum. You'll need to sand and prime it yourself unless you buy pre-primed boards.
Pre-primed boards: Cost a bit more upfront, but they save you time. You skip the sanding and priming steps and go straight to painting. If your time is worth money (and it is), this is often the smarter play.
Pro tip: If you're buying in bulk, say, you're doing multiple rooms: hit up a local lumber yard instead of a big-box store. You'll save 20–30% and usually get better-quality wood. We work with a couple of suppliers in the valley who give us contractor pricing, and we pass those savings on to our clients.
When DIY Makes Sense (and When It Doesn't)
Look, I'm all for DIY. But finish carpentry has a learning curve. If your cuts aren't perfect, your corners are going to gap. If your nail gun pressure is off, you'll leave dents. If you don't know how to scribe baseboard to an uneven floor, you'll end up with weird gaps at the bottom.
DIY makes sense if:
You've got basic carpentry skills (or you're willing to learn)
You own or can borrow a miter saw and a finish nailer
You're doing one or two rooms and can afford to make mistakes
You've got the time and patience to measure twice, cut once
Hire a pro if:
You're doing the whole house and want it done fast
Your walls are wonky (old homes in Sandy and Bountiful, I'm looking at you)
You want perfect corners and zero touch-ups
You'd rather spend your weekend literally anywhere else
We're licensed (Lic #12888335-5501) and insured, and we handle finish carpentry projects all over the Salt Lake Valley. If you're in Herriman, Riverton, West Valley City, Sandy, Magna, or anywhere in between, we've probably worked in your neighborhood.
What Your Handyman Pros Does Differently
Here's the thing: we're not just "guys with tools." We are B100 General Contractors, which means we can pull permits, manage subcontractors, and handle everything from drywall repair to deck builds. When it comes to baseboard upgrades, that level of experience shows.
We don't just slap boards on the wall and call it a day. We:
Check for level and plumb before we start (you'd be surprised how many walls aren't straight)
Scribe baseboards to uneven floors so there are no gaps
Use proper joinery on inside and outside corners (no caulk-and-pray shortcuts)
Coordinate with painters if you're doing a full refresh
Clean up completely when we're done (no sawdust tornados in your living room)
And because we do this all the time, we're fast. What might take a DIYer a full weekend, we can usually finish in a day.
The Finishing Touches: Caulk, Paint, and Patience
Once your new baseboards are up, the finishing touches are what separate "good enough" from "wow."
Caulk every seam. Top edge, bottom edge, corners: everywhere the trim meets the wall or floor. Use paintable caulk and a damp finger to smooth it out.
Prime if needed. If you're using raw wood or MDF, prime it first. Don't skip this. Paint soaks into raw wood unevenly and looks blotchy.
Use quality paint. Semi-gloss or satin finish works best for trim. It's easier to clean and reflects light nicely. Cheap paint shows roller marks and doesn't hold up.
Two coats minimum. One coat looks thin. Two coats look professional.
If you're painting the baseboards a different color than the walls (classic white trim with colored walls, for example), tape carefully and take your time. Or, again, hire us. We've got the steady hands and the patience.
February = Perfect Timing
Here's why February is ideal for baseboard upgrades in Utah:
No weather excuses. It's indoors. You don't care if it's snowing.
Tax refunds are landing. People have a little extra cash and want to spend it on something tangible.
Spring prep. Get the interior done now, and you're ready to tackle exterior projects when the weather warms up.
Contractors are available. Landscapers and painters are slow in February. Finish carpenters (like us) are ready to work.
If you've been thinking about upgrading your baseboards, now's the time. Don't wait until summer when everyone's booked solid with deck builds and fence repairs.
Ready to upgrade? Give Your Handyman Pros a call. We will walk through your home, measure everything, give you a flat quote (no surprises), and have your baseboards looking sharp. We work all over the Salt Lake Valley: Herriman, Sandy, Riverton, West Valley City, Magna, Bountiful, you name it.
Because here's the truth: your home deserves to look finished. And taller baseboards? That's the easiest, cheapest way to get there.

Are Utah Energy Rebates Dead? What Salt Lake Homeowners Need to Know About Heat Pump & Insulation Incentives in 2026
Are Utah Energy Rebates Dead? What Salt Lake Homeowners Need to Know About Heat Pump & Insulation Incentives in 2026
Look, I get it. You've been hearing rumors that energy rebates are dead. Your neighbor in Herriman says they're gone. Your brother-in-law in Sandy swears they expired. And honestly? The confusion is 100% understandable.
But here's the truth: Energy rebates aren't dead: they just changed clothes.
Federal incentives are still very much alive in 2026, and if you play your cards right (and make some smart moves before a key deadline this summer), you could pocket thousands of dollars for upgrades you were probably planning to do anyway.
So let's cut through the noise and get you the facts: because leaving money on the table is never a good look.
The Big Question: What Federal Rebates Are Still Available?
Short answer: A lot more than you think.
The 25C tax credit (officially called the Energy Efficient Home Improvement Credit) is still kicking, and it covers some of the most popular home upgrades Salt Lake Valley homeowners are already doing:
Heat Pumps: Up to $2,000
If you're upgrading to a qualifying electric air-source heat pump or electric heat pump water heater, you can claim up to $2,000 on your federal taxes. Heat pumps are a big deal in Utah: they heat in winter, cool in summer, and are way more efficient than old-school furnaces and AC units. Plus, with our wild temperature swings (January freeze, then 60 degrees in February, anyone?), a heat pump just makes sense.
Air Conditioners & Furnaces: Up to $600 Each
Got a furnace that sounds like a jet engine? An AC unit that's been wheezing since 2008? You can claim up to $600 per qualifying system. The kicker? There's a maximum aggregate annual credit of $3,200 across all your energy-efficient upgrades. So if you're doing multiple projects (heat pump, insulation, windows), you can stack those credits: up to a point.
Insulation & Weatherization: Up to $1,100
Here's where things get interesting (and time-sensitive). You can claim up to $1,100 for insulation, air sealing, energy-efficient windows, and doors. You can receive up to $600 for windows. You can also receive up to $250 per exterior door, capping at $500.
What About Local Utility Rebates?
Great news: Rocky Mountain Power's Wattsmart and Dominion Energy's ThermWise programs are still going strong.
These aren't federal rebates: they're offered by your local utility companies, and they can seriously sweeten the deal:
ThermWise: Offers rebates for qualifying insulation, air sealing, HVAC upgrades, and smart thermostats. The exact amounts vary, but we're talking hundreds (sometimes thousands) depending on the project.
Wattsmart: Rocky Mountain Power continues to offer rebates for energy-efficient upgrades, including heat pumps, insulation, and LED lighting. Wattsmart also offers battery incentives that vary by enrollment period and capacity. Check the current program details before planning a project.
Here's the thing: stacking federal and utility rebates is where the magic happens. You could get a federal tax credit and a local utility rebate for the same project. That's like double-dipping, but totally legal and encouraged.
What's Actually Gone?
Let's be real for a second. Some rebates did expire, and that's probably where the "rebates are dead" rumor started.
Utah's $2,000 state solar tax credit ended in 2023. If you installed solar panels in 2024 or later, you can't claim that state credit anymore. (You can still claim the federal solar credit, but the state one is toast.)
And looking ahead? There are no new state-level energy incentives planned. Utah's voluntary renewable portfolio standard doesn't exactly light a fire under utilities or the state government to roll out fresh programs. So what you see now is pretty much what you'll get for the foreseeable future.
Bottom line: Don't wait for new incentives to magically appear. Use the ones that exist right now.
How Your Handyman Pros Can Help (Because You Shouldn't DIY This)
Look, I'm all for a good DIY project. But when you're talking about thousands of dollars in rebates and tax credits, you want a licensed, insured contractor handling the work: Many utility rebates require approved contractors, and professional installation helps ensure the work meets efficiency standards and documentation requirements.
Here's where we come in.
We are B100 General Contractors (Lic #12888335-5501). We can handle the full project management for energy-efficient upgrades:
Insulation: Attic, walls, crawl spaces: we'll make sure your home is properly sealed and insulated so you're not heating/cooling the great outdoors.
Heat Pump Prep: Getting your home ready for a heat pump install (ductwork modifications, electrical upgrades, etc.) is a big part of the job, and we coordinate with trusted HVAC pros to make the whole process smooth.
Weatherization & Air Sealing: We'll find the gaps, cracks, and leaks that are costing you money every month.
Windows & Doors: If you're replacing old, drafty units with energy-efficient models, we'll make sure the install is done right (because a poorly installed window is worse than the old one).
And here's the best part: we know how to document everything for rebates and tax credits. We'll provide the receipts, invoices, and specs you need to file your paperwork and get your money back.
How to Actually Claim These Credits
Filing for federal energy credits is easier than you think. You'll use IRS Form 5695 (Residential Energy Credits) when you file your 2026 tax return.
Here's what you'll need:
Receipts and invoices from your contractor (that's us)
Manufacturer's Certification Statements (we'll help you get these)
Proof that the equipment/materials meet federal efficiency standards
For utility rebates (ThermWise, Wattsmart), the process varies, but usually involves:
Submitting an application (sometimes before the work starts)
Providing receipts and proof of purchase
Getting an inspection or verification (depending on the project)
We've done this enough times to walk you through it step-by-step. You won't be figuring this out alone.
The Bottom Line: Don't Leave Money on the Table
Federal energy rebates aren't dead: they're just underutilized.
If you've been thinking about upgrading your insulation, installing a heat pump, or replacing drafty windows in your Sandy, Herriman, or Bountiful home, set a reasonable timeline and make these upgrades before another year passes.
We're here to make it easy. We'll handle the project, coordinate with HVAC and electrical pros, and make sure you get every dollar of rebates and credits you're entitled to.
Because honestly? You've got better things to do than leave thousands of dollars on the table.
Ready to get started? Contact Your Handyman Pros and let's make 2026 the year you upgrade your home and your bank account.

10 Days of Curb Appeal - Day 10: The Grand Entrance, Front Door Makeovers & Final Touches
10 Days of Curb Appeal - Day 10: The Grand Entrance, Front Door Makeovers & Final Touches
We made it. Day 10. The finale. The curtain call. The grand entrance.
If curb appeal were a movie, your front door would be the leading actor, the thing everyone remembers when the credits roll. It's the focal point. The handshake. The first impression and the last thing visitors see before they walk inside.
And if you've been following along since Day 1, you've already done the heavy lifting: cleaned the gutters, fixed the walkway, upgraded the lighting, tamed the landscaping. Your home is looking sharp. Now it's time to give your front door the glow-up it deserves.
Let's talk paint, hardware, wreaths, and those final touches that turn a "nice house" into a "wow, I love that place" house.
Why Your Front Door Matters (More Than You Think)
Your front door is doing a lot of work. It's:
The visual anchor of your entire facade
The first thing people notice when they pull up
A signal about how well you maintain the rest of the house
A mood setter, boring door = boring house; bold door = "these people have taste"
In the Salt Lake Valley, where homes range from mid-century ranches to newer builds in Herriman and Sandy, your front door is one of the easiest ways to inject personality without a full exterior remodel.
And here's the kicker: a fresh front door is one of the highest-ROI upgrades you can make. We're talking a few hundred bucks in paint and hardware for a transformation that looks like you spent thousands.
Step 1: Paint It Bold (Or At Least Fresh)
If your door is currently "builder beige" or "sun-faded red from 2009," it's time.
Prep Work (Yes, It Matters)
Don't skip this part. A poorly prepped door will peel within a year, and you'll be back at square one.
Clean it thoroughly. Use a degreaser or soapy water to remove grime, fingerprints, and pollen. Let it dry completely.
Scrape off old, flaking paint. If the paint is bubbling or peeling, scrape it smooth with a putty knife.
Sand lightly. A quick scuff with fine-grit sandpaper helps new paint adhere.
Prime if needed. If you're going from dark to light (or bare wood to paint), use a quality exterior primer.
Pick a Color That Pops
This is where you get to have fun. Your door color should complement your home's style but also stand out enough to catch the eye.
Some crowd favorites for Utah homes:
Navy blue (classic, works with almost everything)
Charcoal gray (modern, pairs well with white/cream exteriors)
Deep red or burgundy (traditional, warm, inviting)
Forest green (earthy, great with brick or stone)
Bold yellow or coral (if you're feeling brave and your HOA allows it)
For a traditional ranch? Try a muted grayish-blue. For a craftsman? Deep green or warm brown. For a modern build in Riverton? Charcoal or even black with brass hardware.
Pro tip: Test your color on a small section or foam board first. Utah's intense sun can make colors look different at noon vs. sunset.
Painting Technique
If you're DIYing this:
Remove hardware if possible (doorknob, lockset, hinges). It's easier than taping around them and you'll get a cleaner finish.
Use exterior-grade paint with low-drip formula. You want something durable that can handle our freeze/thaw cycles.
Paint the edges first, the parts that touch the door frame. Let them dry slightly before closing the door.
Work your way inward: molding, panels, then flat surfaces.
Two thin coats beat one thick coat. Let the first coat dry completely (check the can, usually 2-4 hours).
And for the love of all things holy, don't paint in direct sunlight or when it's below 50°F. Yes, even though it was 50° on Groundhog Day, wait for a mild, dry day with temps above 55° and low humidity.
Step 2: Upgrade the Hardware
New paint is great. New paint plus new hardware? That's a showstopper.
Swapping out old, tarnished hardware is shockingly easy and makes a massive visual difference.
What to replace:
Doorknob/lockset – Go for something substantial. Brushed nickel, matte black, or oil-rubbed bronze are all solid choices depending on your home's vibe.
Deadbolt – If yours is old or sticky, replace it. Bonus: upgrade to a smart lock (August, Schlage Encode, Yale) for added security and convenience.
Door knocker or kick plate – Optional, but classy. A brass knocker adds traditional charm; a sleek kick plate protects the bottom of the door and looks polished.
Hinges – If they're rusty or painted over, swap them out. Matching your hardware finish across all pieces is chef's kiss.
One rule: Keep it cohesive. If your door handle is matte black, your house numbers, mailbox, and light fixtures should ideally match (or at least coordinate). Consistency = intentional design.
Step 3: Add the Finishing Touches
Your door is painted. Hardware is fresh. Now it's time to accessorize.
Wreaths & Seasonal Decor
A wreath is like jewelry for your door. It softens the look, adds warmth, and signals "someone cares about this place."
Year-round options:
Eucalyptus wreath (evergreen, literally and aesthetically)
Boxwood wreath (classic, never goes out of style)
Grapevine wreath with seasonal swaps (ribbon, faux florals, pinecones)
Seasonal swaps:
Spring: pastel flowers, greenery
Summer: bright florals, citrus accents
Fall: wheat, berries, mini pumpkins
Winter: evergreen branches, red berries, plaid ribbon
Hang it with a wreath hanger (not nails: protect that fresh paint!) and swap it out 2-4 times a year to keep things fresh.
Door Mat
A good doormat is functional and decorative. Skip the flimsy "Welcome" mats from the grocery store. Go for:
Coir mats (natural fiber, durable, scrapes dirt well)
Rubber-backed mats with personality (funny sayings, seasonal designs)
Layered look: Large coir mat underneath, smaller decorative mat on top
Make sure it's proportional to your door. Too small looks cheap; too large looks awkward. A 24" x 36" mat works for most standard doors.
Lighting (One Last Check)
We covered this on Day 2, but it's worth repeating: your front door lighting matters.
If you haven't upgraded your fixture yet, now's the time. A modern sconce or pendant light flanking the door (or a statement fixture above) ties the whole look together.
Warm white bulbs (2700K-3000K) = inviting. Cool white bulbs = hospital waiting room. Choose wisely.
Potted Plants (From Day 9)
Two large planters flanking the door? Still one of the best moves you can make. Pansies and ornamental kale are crushing it in this 50° "fake spring" weather, and they'll survive the inevitable late freeze.
If you didn't grab pots yet, do it. Instant symmetry, instant polish.
The 10-Day Curb Appeal Checklist (Your Victory Lap)
You made it through all 10 days. Here's your quick-hit recap to make sure nothing got missed:
✅ Day 1: Walkways & Driveways – Cleaned, sealed, or repaired cracks
✅ Day 2: Outdoor Lighting – Upgraded fixtures, added path lights
✅ Day 3: House Numbers & Mailbox – Replaced old numbers, refreshed mailbox
✅ Day 4: Landscaping Basics – Trimmed bushes, edged beds, mulched
✅ Day 5: Window Boxes & Shutters – Added window boxes or refreshed shutters
✅ Day 6: Pressure Washing – Cleaned siding, walkways, and driveway
✅ Day 7: Lawn Care & Edges – Mowed, edged, treated bare spots
✅ Day 8: Gutters – Cleaned and straightened sagging sections
✅ Day 9: Potted Plants – Added seasonal color in large planters
✅ Day 10: Front Door Makeover – Painted, upgraded hardware, added decor
If you tackled even half of this list, your home looks noticeably better. If you did it all? You're winning the neighborhood curb appeal competition.
When to Call a Pro (No Shame in the Handyman Game)
Look, some of this stuff is easy. Painting a door? Hanging a wreath? Most homeowners can knock that out on a Saturday.
But if your door is warped, sticking, or needs a full replacement? If the frame is rotted? If you're staring at a project and thinking "I have no idea where to start"?
That's what we're here for.
At Your Handyman Pros, we've painted more front doors across Herriman, Sandy, West Valley City, and Magna than we can count. We've replaced hardware, installed smart locks, fixed sagging frames, and built custom entryway upgrades that make homes look like they're worth 20% more.
Licensed (Lic #12888335-5501) and insured, we handle the stuff you don't want to (or shouldn't) DIY.
Final Thoughts: Make It Yours
Curb appeal isn't about perfection. It's about intention. It's about showing that you care, that your home is loved and maintained, and that you've put thought into how it presents itself to the world.
Your front door is the exclamation point on that effort.
So whether you go bold with a navy door and brass hardware, or you keep it simple with fresh paint and a seasonal wreath, make it yours. Make it welcoming. Make it the kind of entrance that makes people smile when they pull up.
You've spent 10 days upgrading your curb appeal. Now it's time to stand back, admire the work, and maybe: just maybe: take a photo for the "before and after" folder.
Because honestly? Your house looks great.
Need help with your front door makeover or any of the other 9 days? We've got you covered. Call Your Handyman Pros and let's make your home the best-looking one on the block.

10 Days of Curb Appeal - Day 9: The Finishing Touch, Potted Plants & Seasonal Color
10 Days of Curb Appeal - Day 9: The Finishing Touch, Potted Plants & Seasonal Color
Welcome to Day 9 of our 10 Days of Curb Appeal series, and happy Groundhog Day!
So, Punxsutawney Phil saw his shadow this morning, which apparently means six more weeks of winter. Meanwhile, here in the Salt Lake Valley, we're sitting at a very comfortable 50 degrees, the sun is shining, and honestly? It feels like spring already showed up and didn't bother checking Phil's forecast.
This is Utah in a nutshell. We don't do predictable seasons here. We do "wear your parka in the morning and shorts by noon" seasons. And that makes today's topic, potted plants and seasonal color, both exciting and slightly tricky.
But here's the good news: containers are the perfect curb appeal tool for our schizophrenic weather. They're flexible, movable, and you can swap them out faster than Utah's temperature drops. Let's talk about how to use pots and seasonal color to give your home's entrance that polished, welcoming look without gambling your entire landscaping budget on a surprise late-March snowstorm.
Why Potted Plants Are the Ultimate Curb Appeal Finisher
If the rest of our 10 Days series has been about structure, paint, lighting, edging, gutters, then Day 9 is about personality.
Potted plants are like accessories for your home. They add warmth, color, and that "someone lives here and cares" vibe that makes a house feel inviting. A front door flanked by matching planters just looks more complete. More intentional. More finished.
And unlike permanent landscaping, containers give you options. You can change them with the seasons, move them around if something isn't working, or bring them inside when Utah throws one of its classic weather tantrums. It's curb appeal with a safety net.
For homes across the Salt Lake Valley, whether you're in Herriman, Sandy, Riverton, West Valley City, or Magna, containers let you work with our unpredictable climate instead of fighting it. You're not committing to perennials that might freeze. You're not risking annuals that could get buried in a freak April blizzard. You're just adding pops of color that you can protect if needed.
The Utah Spring Gambling Game: When to Plant What
Here's the million-dollar question every Salt Lake Valley homeowner faces right now: "Can I put my plants out yet?"
It's 50 degrees. The sun feels amazing. Garden centers are already stocking pansies and primrose. Your neighbors down the street have planters out. So... is it safe?
The short answer: sort of. The longer answer: it depends on what you're planting and how much risk you're willing to take.
Cold-hardy options like pansies, violas, snapdragons, and ornamental kale can absolutely handle this weather, and even a light freeze. These are your "insurance plants." They laugh at 30-degree nights. If you want color now without worrying about covering everything with a blanket during the next cold snap, stick with these.
Tender annuals like petunias, geraniums, and impatiens? Those are gambling plants until we're solidly past our last frost date, which is typically mid-May for the Salt Lake Valley. Sure, you could put them out now and hope for the best. But one hard freeze and you're replanting everything. I've seen too many Herriman homeowners lose gorgeous hanging baskets to a surprise Easter snowstorm to recommend rolling those dice this early.
The smart play? Layer your containers. Start with cold-hardy plants now for instant color. Then swap in or add tender annuals once we hit mid-May and the risk drops. That way you get curb appeal today and you're not crying over frozen petunias in three weeks.
Container Selection: Size, Material, and Placement
Let's talk about the actual pots, because this is where a lot of homeowners accidentally sabotage their own curb appeal.
Size matters. And I mean really matters. One of the biggest mistakes I see is tiny pots scattered around like someone was playing checkers with plants. It looks cluttered and unintentional.
Instead, go bigger. A pair of substantial planters flanking your front door has way more visual impact than six small ones scattered across the porch. Think 16-20 inches in diameter minimum. Large planters anchor your entrance and look expensive, even if the plants inside were budget picks from the clearance rack.
Material choice affects both look and practicality. Ceramic and terracotta look gorgeous but can crack in freezing temperatures, and yes, we're still getting freezing nights even during these warm days. If you go this route, make sure they're rated for freeze-thaw cycles or plan to move them inside during cold snaps.
Resin and fiberglass planters are lighter, more durable, and come in styles that mimic everything from aged stone to modern concrete. They're practically bulletproof for Utah weather and way easier to move around.
For a cohesive look, match your planter color to existing accents on your home. If you've got black shutters or trim, black planters create instant visual flow. Burgundy door? Burgundy or complementary gray planters tie everything together.
Placement strategy is simple: symmetry equals polish. Two matching planters flanking your front door instantly make your entrance look more formal and put-together. If you have a larger porch, add a third larger planter off to one side for visual interest without losing that clean, balanced look.
For walkways leading to your door, containers along the path create a welcoming progression that guides visitors toward your entrance. Just keep them large enough to make a statement, remember, we're aiming for impact, not a breadcrumb trail of tiny pots.
What to Plant Right Now (Without Regrets)
Okay, so it's early February. The weather is weirdly nice. You want color. What actually makes sense to plant?
Pansies and violas are your MVPs right now. They come in every color imaginable, they're tough as nails, and they actually like cool weather. Plant them now and they'll bloom happily through spring. If we get a late freeze, they'll bounce back.
Ornamental cabbage and kale might sound weird, but they're legitimately beautiful. The purple, pink, and white varieties add incredible texture and color, and they handle cold better than almost anything else. Bonus: they look especially good in modern or contemporary planters.
Evergreen fillers like small junipers, boxwood, or dwarf Alberta spruce give you year-round structure. Pair them with seasonal flowering plants for a container that always looks intentional, even when you swap out the blooms.
Spring bulbs in pots are another great option if you planned ahead (or if garden centers still have pre-potted ones available). Daffodils, tulips, and hyacinths give you that classic spring color, and you can move the pots out of sight once they fade.
What you should avoid right now: anything tropical, anything labeled "full sun annual," and anything the garden center employee describes as "tender." Save those for May when you're not gambling with Mother Nature.
The Portable Advantage: Containers You Can Rescue
This is where container gardening really shines in Utah: mobility.
When the weather forecast shows a hard freeze coming (and it will, probably multiple times before actual spring arrives), you can bring your containers onto a covered porch, into the garage, or even inside for the night. Try doing that with an in-ground flower bed.
I've had clients in Sandy and Riverton who keep a few beautiful planters on a dolly specifically so they can roll them to safety when needed. It sounds a little extra, but it's way less work than replanting everything after a freeze.
Even just moving containers against the house or under an overhang can provide enough protection during marginal nights. Your plants get a few extra degrees of warmth from the building's residual heat, and the overhang blocks frost from settling directly on leaves.
Quick Wins vs. Long-Term Investments
If you're trying to decide how much effort to put into container gardening, think about your goals.
For a quick curb appeal boost, like if you're selling soon or just want your house to look better now, grab a couple of large planters, fill them with pre-blooming pansies, and call it done. Two hours of work, instant impact.
For long-term enjoyment, invest in quality planters you actually like looking at, and plan for seasonal rotations. Spring pansies become summer geraniums become fall mums become winter evergreens. The planters stay; the contents change. It's curb appeal that evolves with the seasons and never looks stale.
Either approach works. Just be honest about how much maintenance you want to commit to.
DIY or Call a Pro?
Planting containers is definitely DIY-friendly for most homeowners. It's hard to mess up too badly, and garden centers are usually happy to give advice on plant combinations.
That said, if you want a truly polished look, especially for larger planters or multiple containers with coordinated color schemes, a professional landscaper or even a handyman familiar with landscaping can save you time and design headaches. We help Salt Lake Valley homeowners with container setup and seasonal changeovers all the time, especially for clients who want the look but don't have the time.
For more seasonal home maintenance tips, check out our Utah Spring Home Prep Checklist:
https://www.yourhandymanpros.com/pro-tips-and-projects/utah-spring-home-prep-checklist
The Bottom Line
Day 9 is about adding that final layer of warmth and personality to your home's exterior. Potted plants give you instant color, serious flexibility, and the ability to adapt to whatever Utah's weather decides to do next.
Yes, it's Groundhog Day and technically still winter. But when it's 50 degrees outside and your front porch is calling for a refresh, there's no reason not to add some cold-hardy color and enjoy it.
Tomorrow we'll wrap up the series with Day 10, where we'll talk about pulling it all together and maintaining your curb appeal upgrades long-term.
See you then!
,
Ready to finish your curb appeal transformation? Your Handyman Pros serves homeowners throughout the Salt Lake Valley, including Herriman, Riverton, Sandy, West Valley City, and Magna. Whether you need help with planters, seasonal updates, or any of the projects we've covered in this series: we've got you. Licensed (Lic #12888335-5501) and insured. Give us a call.
,
This is Day 9 of our 10 Days of Curb Appeal series. Missed earlier posts? Check out Day 7: Edging & Mulch and Day 8: Gutters.